How to Adjust Bike Brakes and Tighten Them Step by Step (No Tools Needed)
Every cyclist knows this feeling. You squeeze your brake levers, and they pull all the way to the handlebar with a spongy, weak response. Your stopping power is poor. Your confidence drops fast. But you can fix this common problem in minutes, right where you are, with no tools needed. It's true. The secret lies in a small but mighty part called the barrel adjuster.
This guide will show you exactly how to use this adjuster to tighten your bike brakes for crisp, reliable performance. We believe that basic bike maintenance should be easy for everyone. This simple, tool-free adjustment is the perfect place to start. We'll walk you through the process step-by-step, helping you take control of your bike's safety and feel.
A Quick Safety Check
Before we start turning anything, you need to do a quick 60-second safety check. This makes sure you're not trying to adjust a system that has a bigger problem. Doing a thorough electric bike brake check is the first step any professional mechanic takes, and it's a habit every rider should learn.
Check Your Brake Pads
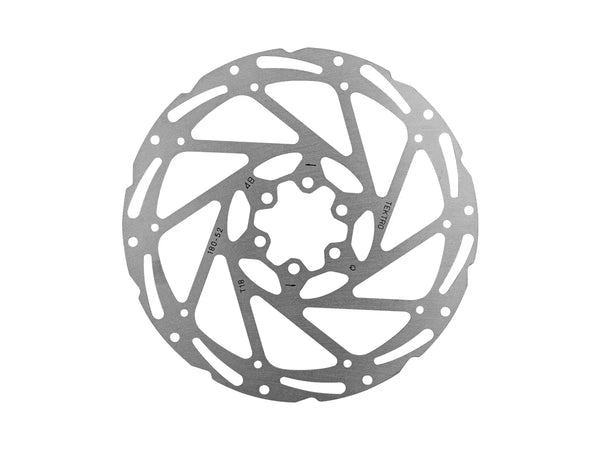
Look closely at the rubber blocks that press against your wheel's rim (for rim brakes) or the metal disc (for disc brakes).
- Look for Wear: New brake pads have a thick layer of rubber with grooves cut into them. Worn-out pads will look thin, smoothed over, and the grooves may have disappeared.
- Find the Wear Line: Many pads have a "wear indicator line" molded into the rubber. If the pad material is worn down to this line, it's time for a replacement.
- Listen for Grinding: If you hear a harsh, metallic grinding sound when you brake, stop riding right away. This means your pads are completely gone, and you're grinding the metal pad holder against your rim or rotor, which can cause serious damage.
Check the Brake Cable
Look at the thin metal cable that runs from your brake lever on the handlebar down to the brake itself. Look for any signs of damage.
- Fraying or broken strands of wire
- Heavy rust that flakes off
- Sharp kinks or bends in the cable
If you see any of these problems, the cable is damaged and needs to be replaced. No amount of adjustment can fix a damaged cable.
Test the Brake Lever
Pull the brake lever firmly and watch the brake mechanism at the wheel. Do both brake arms move toward the rim or rotor? When you release the lever, do they spring back to their original position quickly and equally? If they are slow or one side doesn't move, you may have a sticky cable or a problem with the brake caliper itself.
Understanding Barrel Adjusters
The key to this entire tool-free process is the barrel adjuster. Learning what it is and how it works will help you understand your brake system forever.
What is a Barrel Adjuster?
A barrel adjuster is a hollow, threaded tube that your brake cable passes through. Its job is to make small changes to the cable's length, which adjusts the cable tension. Think of it like a volume knob for your brake cable tension. By turning it, you can fine-tune how tight or loose your brakes feel without using any tools.
How It Works
The idea is simple. The brake cable housing (the outer cover) rests against one end of the adjuster.
- To tighten the brakes (increase tension), you turn the barrel adjuster counter-clockwise. This unscrews it, moving the housing further away from the lever or caliper, which pulls the inner cable tighter.
- To loosen the brakes (decrease tension), you turn the barrel adjuster clockwise. This screws it in, shortening the housing's path and adding more slack into the inner cable.
Many barrel adjusters also have a thin lockring at their base. This is a small, ridged ring that you tighten against the lever body to prevent the adjuster from moving out of position while you ride.
Finding Your Adjusters
You can find barrel adjusters in one or more of these common places.
- On the Brake Levers: This is the most common spot. Look for a ridged metal or plastic cylinder right where the black cable housing enters the brake lever assembly on your handlebar.
- On the Brake Caliper: Some brake systems, especially V-brakes and many mechanical disc brakes, have a barrel adjuster where the cable enters the brake arm or caliper body.
- In-line Adjusters: Common on road bikes, these are small adjusters placed in the middle of a stretch of cable housing, often near the handlebars for easy adjustments while riding.
You should be able to turn these with just your fingers. If an adjuster is stiff, try holding the cable housing with one hand while turning the adjuster with the other to get more leverage.
How to Tighten Brakes: Step-by-Step
With your safety check complete and your barrel adjusters located, you're ready to make the adjustment. This entire process should take less than five minutes.
1. Check the Current Lever Feel
Squeeze the brake lever you want to adjust. Notice how far it travels before the brake pads make firm contact with the rim or rotor. Is it more than halfway to the handlebar? Our goal is to have the lever travel about one to two inches (or roughly halfway to the bar) before the brakes are fully engaged, giving you a firm and responsive feel.
2. Turn the Barrel Adjuster
To tighten the brakes and remove that extra slack, you will turn the barrel adjuster counter-clockwise. If there is a lockring, first turn it clockwise a few turns to loosen it and give yourself room to work. Now, turn the main barrel adjuster one full rotation counter-clockwise. You will see it move out and away from the brake lever or caliper body.
3. Test the Lever Again
Squeeze the brake lever again. You should feel a difference right away. The lever should feel firmer and engage the brake pads much sooner in its travel.
4. Fine-Tune the Tension
Now it's time for small adjustments.
Still too loose? Turn the barrel adjuster another half-turn counter-clockwise and test again. Repeat in small steps until the lever feel is perfect.
Too tight? If you've gone too far, the brake pads might now be rubbing against the rim or rotor, even when you're not pulling the lever. To fix this, turn the barrel adjuster clockwise a quarter-turn at a time until the rubbing stops. You're aiming for a gap of about 1-3mm between each brake pad and the braking surface.
5. Lock It In
Once you're happy with the lever feel and there's no rubbing, hold the barrel adjuster in place and turn the lockring (if you have one) counter-clockwise until it's snug against the brake lever body. This prevents your perfect adjustment from changing as you ride.
Quick Problem Fixes
Sometimes the issue is more than just a loose cable. Here are a few common problems and their quick, often tool-free solutions.
Problem: One Pad Rubs
If one brake pad is rubbing against the rim while the other has a large gap, the brake is off-center.
Tool-Free Fix 1: Check Your Wheel. The most common cause is a wheel that isn't seated correctly. Open the quick-release lever (the lever on the hub in the center of your wheel), make sure the wheel's axle is pushed all the way up into the slots in the frame, and then firmly close the quick-release lever again. This often re-centers the wheel and solves the problem.
Tool-Free Fix 2: Move the Caliper. For many common side-pull caliper brakes (found on many road bikes), you can re-center them by hand. Grab the entire brake assembly and give it a firm but gentle push to shift it into the center. Squeeze the brake lever a few times to see if it stays centered.
Problem: Rough or Sticky Brakes
If the lever feels rough when you pull it or is slow to spring back when you release it, the cable is likely sticking inside the housing due to dirt or lack of oil.
Tool-Free Fix: Place a single drop of bicycle-specific oil right where the metal cable enters the housing at the barrel adjuster. Do the same at the other end of the housing near the brake caliper. Now, work the brake lever hard 15-20 times. This helps pull the oil down into the housing and can free up a sticky cable.
Problem: Adjuster is Maxed Out
What if you've unscrewed the barrel adjuster all the way and the brakes are still too loose? This means there's too much slack in the cable for a fine-tuning adjustment to fix. This is the point where you will need a tool.

When You Need Tools
The barrel adjuster is for fine-tuning. When it can't provide enough adjustment, it's a sign that a larger adjustment is needed or that a part needs replacement.
The Cable Anchor Bolt
This is where the initial cable tension is set. When your barrel adjuster is maxed out, you need to reset the system.
- Turn your barrel adjuster(s) almost all the way in (clockwise), leaving just one or two turns of thread showing. This gives you maximum fine-tuning range later.
- Find the anchor bolt that pinches the brake cable to the brake caliper arm.
- Using the correct tool (usually a 5mm Allen key or a small 8-10mm wrench), loosen this bolt just enough for the cable to slide.
- With one hand, squeeze the brake pads against the rim or rotor. With your other hand, pull the slack out of the cable and re-tighten the anchor bolt firmly.
- Release the pads. Now you can use the barrel adjuster as described above for the final fine-tuning.
Worn Brake Pads: As we covered in the safety check, worn pads must be replaced. Adjusting the cable won't help if there's no pad material left. Replacing pads requires a tool, typically a 4mm or 5mm Allen key, to loosen the bolt holding the pad in place.
Damaged Cable or Housing: A frayed cable or kinked housing is a serious safety issue. It must be replaced. This job requires special bicycle cable and housing cutters to ensure a clean cut, along with Allen keys or wrenches to detach it from the lever and brake.
When to See a Pro: Your brakes are your most important safety feature. If you've tried these adjustments and the brakes still don't feel right, or if you are unsure about any step, don't hesitate to take your commuter e bike to a local shop. A professional mechanic can find and fix the problem quickly and correctly, giving you peace of mind.
Frequently Asked Questions
1. Why are my bike brakes so loose?
The two most common reasons are cable stretch and brake pad wear. New cables have an initial "stretching" period where they settle into the housing, and all cables will stretch slightly over time. As your brake pads wear down, they have to travel further to reach the rim, which also makes the lever feel loose.
2. How often should I check my brakes?
We recommend a quick check before every single ride: squeeze both levers to make sure they feel firm and responsive. A more thorough check of pad wear and cable condition should be done at least once a month, or more often if you ride frequently.
3. What's the difference between tightening and centering?
Tightening refers to adjusting the cable tension to change when and how firmly the brakes engage. Centering refers to aligning the brake caliper so that both pads are an equal distance from the rim or rotor, preventing one side from rubbing.
4. Can I over-tighten my brakes?
Yes. If you tighten the cable too much, the brake pads will constantly rub against the rim or rotor, even when you're not braking. This creates drag, wears out your pads early, and can make a very annoying noise. The goal is to have them as tight as possible without rubbing.
5. Does this adjustment work for all brake types?
This barrel adjuster method works for all cable-operated brake systems. This includes most rim brakes (V-brakes, caliper brakes) and mechanical disc brakes. It does not apply to hydraulic disc brakes, which use fluid instead of a cable and have a different adjustment and maintenance process.


Leave a comment