Electric Bike Kit Disc Brakes: Complete Buying Guide
Fast E-Bike, Weak Brakes?
Your new electric bike kit adds exciting speed and power. But it also adds a lot of weight to your bike. A typical electric bike conversion kit can add 15-25 lbs (7-11 kg) to your bike, which completely changes how it rides. That extra weight, combined with higher speeds, puts huge stress on your braking system. Standard bicycle brakes work fine for regular bikes. But they often can't handle the extra load from an e-bike conversion. They can get too hot, lose power, and fail when you need them most.
This isn't just about performance - it's about staying safe. This guide will help you choose the right electric bike brake kit without getting confused. We'll focus on what works, what doesn't work, and how to make sure you have enough stopping power to ride safely.
Mechanical vs. Hydraulic Brakes
The most important choice you'll make is between mechanical and hydraulic disc brakes. Both systems work by squeezing brake pads against a rotor. But they work in very different ways, with big differences in performance, maintenance, and cost.
The Simple & Serviceable Choice
Mechanical disc brakes use cables to work. When you pull the brake lever, a steel cable pulls a lever on the brake, which forces the pads to grip the rotor.
- Pros: They cost less money and are easier to fix. If a cable breaks while you're riding, you can fix it pretty easily with basic tools. You can adjust them quickly using simple adjustments.
- Cons: They don't stop as well and feel "spongy" when you pull the lever. The cables stretch over time and get dirty, so you need to adjust them often to keep them working well.
The Power & Precision Option
Hydraulic disc brakes use a sealed system filled with special fluid. When you pull the lever, it pushes fluid through a hose to the brake, which pushes the pads against the rotor. You can learn more about how disc brakes work for more details.
- Pros: They have much better stopping power. They also give you better control over how hard you brake. The system is protected from dirt and water, and the pads adjust themselves as they wear out, so you don't need to maintain them as much.
- Cons: They cost more money upfront. Fixing them, especially "bleeding" the system to remove air bubbles, is harder and requires special tools and the right type of fluid.
Our Verdict for E-Bikes
For most electric bike applications, hydraulic disc brakes are clearly the better choice. The extra weight and speed of an e-bike need the superior power that only hydraulic brakes can provide consistently. You should only consider mechanical brakes for very low-power hub motor kits on bikes used only for flat areas or if you're on a very tight budget.
| Feature | Mechanical Disc Brakes | Hydraulic Disc Brakes |
|---|---|---|
| Stopping Power | Good | Excellent |
| Modulation | Fair | Excellent |
| Maintenance | Frequent cable adjustments | Infrequent fluid bleeds |
| Cost | Lower | Higher |
| Best For... | Budget builds, flat terrain | E-bikes, heavy loads, hills |
The Non-Negotiable Sensor
When upgrading to an electric bike brake kit, one feature is absolutely essential for safety: a motor cut-off sensor. This is a small electronic switch built into the brake lever. The moment you start to pull a brake lever, this switch sends a signal to your e-bike's controller and instantly cuts power to the motor. This happens right away, which is very important for safety.
Why is this so critical? It eliminates motor "run-on" where many pedal-assist systems keep powering the motor for a second or two after you stop pedaling. Without a cut-off sensor, you could be in a dangerous situation where you're braking while the motor is still trying to push you forward. It also provides panic stop safety. In an emergency, your first reaction is to grab the brakes, not to think about stopping your pedaling. The cut-off sensor makes sure the motor shuts down right away, letting the brakes do their job without the motor fighting against them.
Most complete electric bike brake kits come with these sensors already installed. However, you must check that the connector plug on the brake sensor matches the plug on your controller's wiring. The most common are 2-pin Julet connectors (often red or yellow), but always check your specific system before buying.
The Compatibility Checklist
The most common mistake when buying an electric bike brake kit is finding out it doesn't fit your bike. We've seen this happen hundreds of times. Before you buy anything, go through this checklist step-by-step to save yourself time, money, and frustration.
Step 1: Check Frame Mounts
Look at where the brake attaches to your bike's frame (for the rear brake) and fork (for the front brake). There are two main types:
- Post Mount (PM): The brake bolts directly onto two threaded posts that stick out from the frame or fork, parallel to the wheel.
- International Standard (IS): The brake bolts to an adapter, which then bolts sideways into two holes on a tab on the frame or fork.
While adapters exist to make most combinations work, it's always easier to buy a brake that matches your frame's mounts. This also makes the setup stronger and more reliable.
Step 2: Determine Rotor Size
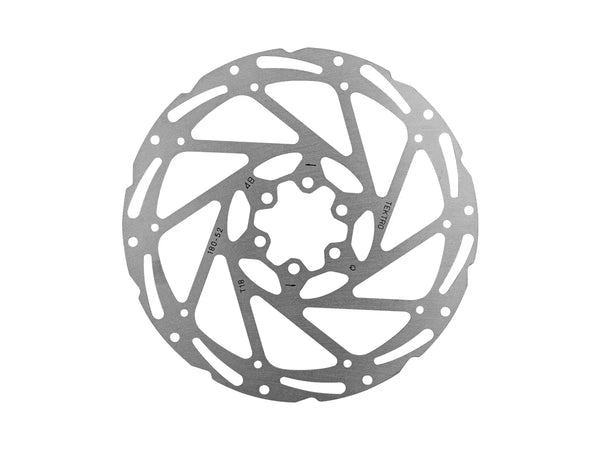
The diameter of the disc rotor affects braking power and heat management. Sizes are measured in millimeters (mm).
- 160mm: This is standard for non-electric road bikes and cross-country bikes. It's generally too small for the demands of an e-bike.
- 180mm: This is our recommended minimum rotor size for the front and rear of a typical e-bike. This gives you noticeably more power and cooling than 160mm.
- 203mm+: We recommend this for heavy-duty use, cargo e-bikes, tandem e-bikes, or aggressive off-road riding.
Before buying larger rotors, you MUST check that your frame and fork have enough room for them. You will also need the right size adapter to position the brake properly for the larger rotor.
Step 3: Check Hub Compatibility
The rotor attaches to your wheel's hub in one of two ways.
- 6-Bolt: The rotor attaches with six small bolts. This is the most common type.
- Center Lock: The rotor slides onto a splined interface on the hub and is held by a single lockring.
These two types are not interchangeable. You can use a 6-bolt rotor on a Center Lock hub with an adapter, but not the other way around. Check your hubs to make sure you buy rotors that match.
Step 4: Measure Hose Length
This is important but often forgotten. A brake kit made for a small mountain bike may have a rear brake hose that's too short for a large-frame e-bike. Use a measuring tape to measure your current brake lines from lever to brake. Make sure the new kit's hoses are at least as long, preferably with a little extra length for clean routing.
What Works, What Fails
After installing hundreds of kits, we've learned to spot the difference between quality brake systems and cheap copies that will fail. Here are our real-world lessons that go beyond the basic specifications.
Signs of a Quality Kit
You can't go wrong with hydraulic brake kits from well-known cycling brands. Even the entry-level hydraulic models from Shimano (like the MT200), SRAM/Avid, Tektro, and Magura work reliably and are among the best mountain bike disc brakes available.
For heavier e-bikes, tandem conversions, or aggressive trail riding, upgrading from a standard 2-piston brake to a 4-piston brake gives you a huge boost in stopping power. Many brands now offer powerful and affordable e-bike-specific brakes with 4-piston designs.
Almost all good hydraulic brake kits are sold "pre-bled." This means they're filled with fluid, have the air removed, and are ready to install right out of the box. This saves DIY builders from a messy and technical step.
Red Flags to Watch For
Be very careful of suspiciously cheap, unbranded hydraulic brake kits from large online marketplaces. While the price looks good, they often use poor-quality seals and materials with no quality control. Brakes are not the place where you want to save money. Look closely at product photos for signs of poor quality. Rough casting marks, sharp edges on the levers, and sloppy paint are all signs of a low-quality product.
If a new hydraulic brake feels soft or the lever pulls all the way to the handlebar, it means there's a bad factory setup or faulty seals. A quality kit should feel firm and responsive from the first pull. As mentioned before, double-check that the motor cut-off sensor plug on the brake kit matches your e-bike controller. Getting this wrong means either a non-working safety feature or having to splice wires, which you should avoid.

Installation and Maintenance
With the right kit, installation is straightforward if you're comfortable working on bikes. However, there are some key points to remember for a safe and successful upgrade.
Installation Tips
Always follow the manufacturer's instructions exactly. Use a torque wrench to tighten all bolts - especially the brake mounting bolts and rotor bolts - to the specified torque values. This is critical for safety. A very important tip for hydraulic brakes: never squeeze the brake lever when the brake is not installed on the rotor. Doing so can push the pistons out of the brake, requiring a full re-setup.
Bleeding Brakes: A Reality Check
While most kits arrive pre-bled, you may eventually need to bleed your brakes to remove air that has entered the system. This causes a spongy lever feel. From our experience, while bleeding is doable as a DIY task, it can be messy and frustrating for beginners.
It requires a model-specific bleed kit and the correct brake fluid. Critically, the two main types of fluid - DOT fluid and Mineral Oil - are not compatible and will destroy your brake seals if mixed. If you're not comfortable with the process, your local bike shop can do this service quickly and correctly.
Frequently Asked Questions
1. Q: Can I use my existing brake rotors with a new electric bike brake kit?
A: It depends on the rotor size and mounting type. If your current rotors are 180mm or larger and in good condition, you can likely reuse them. However, make sure they're compatible with your new brake pads and that they're not warped or excessively worn. Many people upgrade to larger rotors when installing a new brake kit for better stopping power.
2. Q: How often do hydraulic brakes need to be bled?
A: Under normal use, hydraulic brakes typically need bleeding every 1-2 years. However, if you notice the lever feeling spongy, pulling closer to the handlebar, or reduced braking power, it may need bleeding sooner. Heavy use, extreme temperatures, or contamination can require more frequent bleeding.
3. Q: What's the difference between DOT fluid and mineral oil for hydraulic brakes?
A: DOT fluid and mineral oil are two different types of brake fluid that are not interchangeable. DOT fluid is hygroscopic (absorbs moisture) and needs more frequent replacement, while mineral oil is more stable but still degrades over time. Always use the fluid type specified by your brake manufacturer - mixing them will damage the seals and require a complete system rebuild.
4. Q: Do I need special tools to install an electric bike brake kit?
A: Basic installation requires standard bike tools like hex keys, a torque wrench, and cable cutters (for hydraulic hose cutting). You'll also need the correct adapters if your frame mounts don't match the brake calipers. For hydraulic systems, you may eventually need a brake bleeding kit specific to your brake brand, though most kits come pre-bled.
5. Q: Can mechanical disc brakes be upgraded to hydraulic later?
A: Yes, you can upgrade from mechanical to hydraulic disc brakes later, but it requires replacing the entire system including levers, calipers, and adding hydraulic hoses. You can usually keep your existing rotors if they're in good condition and the right size. The upgrade is worth it for the improved stopping power and modulation, especially on e-bikes.


Leave a comment