Choosing the Right Inner Tube for Cycling: Valve, Size & Terrain Tips
The Moment Every Cyclist Knows
Every cyclist has felt it: the soft, sinking feeling of a flat tire. You might be miles from home or just getting ready to ride. Needing a new inner tube is just part of cycling life. The wall of options at a bike shop can look confusing. But it doesn't have to be overwhelming at all. The choice comes down to three key things: Size, Valve Type, and Material. By the end of this guide, you will know how to pick the perfect inner tube for your bike and riding style.
The Must-Know Basics
Before we talk about fancy materials or pro tips, let's cover the two things you absolutely must get right. Matching the size and valve type to your bike is the first step. Getting this wrong means the tube won't work at all. We'll keep this part simple and clear. That way you can solve your biggest problem first.
Reading Your Tire
The right inner tube size depends entirely on your tire. All the info you need is printed on the tire's side. You just need to know how to read it properly.
First, find the series of numbers printed on the side of your tire. You might need to clean dirt off to see them clearly. Next, look for one of the two main sizing standards. You will probably see both of these formats.
Imperial/French (like 700x28c, 26x2.1"): This is the most common format you'll see. The first number (700 or 26) is the wheel diameter in millimeters or inches. The second number (28c or 2.1") is how wide the tire is. A road bike might have a 700x28c tire, while a mountain bike could have a 26x2.1" tire.
ISO/ETRTO (like 28-622): This is the most exact standard. The first number (28) is the tire's width in millimeters. The second number (622) is the exact diameter of the wheel rim in millimeters. This is the most reliable number to use for matching tubes. For example, a 700x28c tire will almost always have an ETRTO marking of 28-622.
Finally, remember that inner tubes fit a range of tire widths. An inner tube box might say "700x25-32c". This means it fits a 700c diameter wheel and will work inside any tire with a width between 25c and 32c. As long as your tire's width (like 28c) falls within the tube's range, you have a match. For more details about sizing, you can check an in-depth guide to bicycle inner tubes.

Presta vs. Schrader Valves
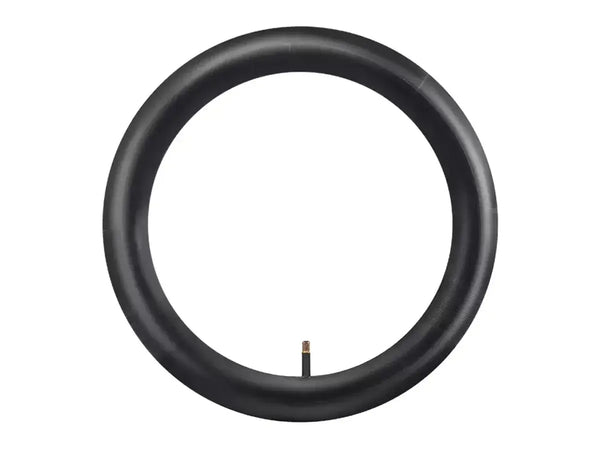
The second key choice is the valve type. Your wheel's rim has a hole drilled for a specific valve size. You must buy a tube with a valve that fits this hole exactly. Presta and Schrader are the two main types in cycling.
| Feature | Presta Valve | Schrader Valve |
|---|---|---|
| Appearance | Thin, with a small locknut at the top that must be unscrewed to inflate. | Wider, same as a car tire valve, with a spring-loaded pin in the center. |
| Commonly Found On | Road bikes, gravel bikes, higher-end mountain bikes. | Mountain bikes, hybrid bikes, kids' bikes, cruisers. |
| How to Use | Unscrew locknut, tap to release air, attach pump, inflate, tighten locknut. | Remove cap, attach pump, inflate, replace cap. |
| Hole in Rim | Requires a smaller hole. | Requires a larger hole. |
The key point is simple: look at the valve on your current tube and buy the same type. A Presta valve is too narrow to fit well in a Schrader rim hole. A Schrader valve is too wide to fit through a Presta rim hole.
One more thing to think about is valve length. If you have deep aerodynamic wheels, you'll need a tube with a longer valve to reach through the rim. Standard valves are around 40mm long. Options exist up to 80mm or more. If you have deep rims, measure the valve on your current tube or check your rim's depth. Make sure the new valve is long enough to attach a pump.
Picking Material for Your Riding Style
Once you've figured out the basics of size and valve type, you can choose based on material. The material of your inner tube affects weight, strength, ride feel, and cost directly. This is where you can match your choice to your specific riding goals. Whether you're a daily commuter or a competitive racer, material makes a difference.
Butyl: The Dependable Choice
Butyl rubber is the standard, most common inner tube material for good reason. This is the black rubber tube that most cyclists know well.
- Who it's for: The everyday cyclist, the daily commuter, the weekend rider, and anyone who values reliability and low cost above everything else.
- Pros: Butyl tubes cost less, are available everywhere, and hold air pressure great for days or even weeks. They are also the easiest material to patch on the side of the road when you get a flat.
- Cons: They are the heaviest option, which adds weight to your wheels that you have to spin. They are also less flexible than other materials. This can create a slightly rougher ride feel and slightly increase rolling resistance.
- Best Use Cases: For daily commuting, long-distance touring, and regular training rides, butyl is the clear winner. It gives you a dependable and affordable solution for most inner tube cycling needs.
Latex: The Speed Option
Latex tubes are often pink or natural tan colored and are the classic choice for competitive cyclists seeking every advantage. These tubes offer benefits that serious riders really notice.
- Who it's for: The competitive road racer, time trialist, and any performance-focused rider who puts speed and ride quality first.
- Pros: The main benefit of latex is how incredibly flexible it is. This flexibility lets the tube bend more easily around bumps in the road. This reduces rolling resistance and gives a noticeably smoother, more comfortable ride. Its stretchiness also makes it more resistant to punctures from small, sharp objects that might pierce other tubes.
- Cons: Latex is more porous than butyl, meaning it loses air much faster. You must pump your tires before every single ride without exception. It also costs more and needs more care during installation to avoid getting pinched between the tire and rim. There are many variables in a cycling inner tube to consider. Material is a big one for performance.
TPU: The New Technology
Thermoplastic Polyurethane (TPU) is the newest material available, offering features that appeal to many modern riders. This high-tech option combines benefits from both traditional materials.
- Who it's for: The weight-conscious cyclist, gravel adventurer, bike packer, or tech-savvy rider looking for the latest innovation in cycling gear.
- Pros: TPU tubes are incredibly lightweight and super compact when rolled up. This makes them an ideal spare tube that takes up almost no space in a jersey pocket or saddle bag. They offer rolling resistance that is usually better than butyl tubes. They are often more durable and puncture-resistant than latex tubes too.
- Cons: The biggest problem is cost since TPU tubes are by far the most expensive option available. Patching them can also be difficult and often needs a specific patch kit made just for TPU. Some early models had problems with durability around the valve stem area. Though this has gotten better, the weight savings are real - TPU tubes like those from Tubolito or Pirelli can weigh as little as 25-40 grams. That's a saving of over 100 grams per wheel compared to a standard butyl tube.
Expert Tips for Success
Choosing the right tube is only half the job. Proper installation and care ensure a smooth experience on the road without problems. We've learned these lessons over thousands of miles and countless tire changes. They will help you avoid the common mistakes that frustrate many cyclists.
How to Install Correctly
The most common failure for a brand-new inner tube is a "pinch flat" during installation. This happens when the tube gets caught between the tire bead and the wheel rim. It creates a snake-like pair of holes as soon as you inflate it. Our step-by-step method will help you avoid this problem:
- Always add a little air first. Before installing the new tube, inflate it just enough to give it a round shape. This prevents it from getting twisted or folded inside the tire and makes it much less likely to get pinched under the tire bead.
- Check the tire carefully. Run your fingers along the inside of the tire to find and remove whatever caused the original flat. A tiny piece of glass or a thorn left behind will immediately puncture your new tube.
- Look at the rim tape. Make sure the rim tape (the strip covering the spoke holes inside the rim) is in good shape, centered, and fully covering every hole. A sharp edge from a spoke hole can easily cause a puncture.
- Use your thumbs only. When putting the final, tight section of the tire bead onto the rim, start opposite the valve and work towards it using your thumbs. Avoid using tire levers if you can since they cause most pinch flats. If you must use a lever, be extremely careful not to catch the inner tube underneath it. For expert advice on this process, check Sheldon Brown's classic guide on tires and tubes.
Carrying Your Spare Tube
How you carry your spare tube matters almost as much as having one. A tube thrown loosely into a saddle bag with sharp tools and keys can easily get a hole from rubbing before you ever need it.
- Best Methods: Keep the spare tube in its original box for the best protection possible. You can also fold it tightly and hold it with a rubber band. For excellent protection, put the folded tube inside an old sock or a small zip-lock bag. This protects it from rubbing and sharp objects in your tool kit. It ensures the tube is in perfect condition when you need it most. We don't recommend using talcum powder since modern tubes don't need it and it just makes a mess.
Stopping Flats Before They Happen
The best way to deal with flats is to prevent them from happening. Proper tire pressure is your first and best defense against punctures. Under-inflation causes most pinch flats. Significant over-inflation can reduce grip and make the tire more likely to get punctured by impacts.
We recommend checking your tire pressure regularly and making it a habit. For high-pressure road bike tires, check before every ride without fail. For lower-pressure hybrid or mountain bike tires, a weekly check works well. Making this part of your routine is as simple as when you perform a pre-ride safety check. Spending a few minutes before you roll out can save you lots of time and frustration on the road. For more help, there are excellent resources on finding your optimal tyre pressure.

Ride with Complete Confidence
Understanding inner tubes for cycles is a basic skill for any cyclist. By learning the three main factors of size, valve, and material, you can make smart choices that improve your ride. Whether you care most about budget, performance, or convenience, this knowledge helps you handle one of cycling's most common maintenance tasks with confidence. It keeps you on the road and enjoying the ride.
Your Simple Buying Checklist
When you're ready to buy, just go through this easy list:
- Size: Check your tire's sidewall and match the diameter (like 700c, 26") and make sure the tire's width falls within the tube's stated range (like 700x25-32c).
- Valve: Look at your wheel rim and current tube carefully. Match the valve type (Presta or Schrader) and make sure the length is enough for your rim depth.
- Material: Choose based on what you need most:
- Butyl: For everyday reliability and good value
- Latex: For competitive speed and better ride feel
- TPU: For minimum weight and a compact spare
Frequently Asked Questions
1. Q: How often should I replace my inner tubes even if they haven't been punctured?
A: Inner tubes don't have a specific expiration date, but rubber does degrade over time. If your tubes are more than 5-7 years old, consider replacing them as the rubber may become brittle and more prone to failure. Also replace tubes that have been patched multiple times or show signs of wear around the valve area.
2. Q: Can I use a slightly different valve length than what I currently have?
A: Yes, as long as the valve is long enough to extend through your rim and allow pump attachment. A longer valve than needed won't hurt performance, but a valve that's too short will make inflation impossible. When in doubt, measure your rim depth and add at least 15mm for pump clearance.
3. Q: Is it worth carrying different spare tubes for different riding conditions?
A: For most riders, carrying one spare tube that matches your current setup is sufficient. However, if you frequently switch between different bikes or wheel sets with different requirements, consider keeping bike-specific spare tubes. Competitive cyclists might carry lighter TPU tubes as spares even if they ride with latex or butyl tubes normally.
4. Q: How can I tell if my puncture was caused by the tube or something else?
A: Examine the puncture pattern on your old tube. Two small holes side by side (snake bite) indicate a pinch flat from low pressure or impact. A single clean hole suggests a sharp object like glass or a thorn. Multiple small holes might indicate worn rim tape or spoke issues. This helps you fix the root cause, not just the symptom.
5. Q: Do I need special tools or pumps for different valve types?
A: Most modern pumps work with both Presta and Schrader valves, either with a reversible head or dual openings. However, some older pumps only work with one type. Check your pump before buying tubes with a different valve type than you currently use, or consider getting a pump head adapter if needed.


Leave a comment