


Fat Ebike Tire Pressure: Best PSI for Pavement vs Sand vs Snow
The Quick Answer You Need
If you're new to fat tire e-bikes, the numbers on the pressure gauge can be confusing. Coming from road or mountain bikes where 40, 60, or even 100 PSI is normal, seeing a recommendation for 8 PSI can feel like a typo. It's not. Fat e-bike tires work on a completely different rule: volume over pressure.
We know you want to get riding, so here's the quick-start guide. These are excellent starting points, but remember that your perfect pressure will be unique.
| Terrain Type | Recommended Starting PSI | Primary Goal |
|---|---|---|
| Pavement / Hard Surfaces | 20-30 PSI | Efficiency and Speed |
| Gravel / Mixed Trails | 12-20 PSI | Balance of Grip & Rolling Resistance |
| Soft Sand / Deep Snow | 5-10 PSI | Maximum Flotation and Traction |
Think of these numbers as your baseline. The rest of this guide is dedicated to helping you move from this starting point to finding the personal sweet spot that will transform your ride, improve your safety, and even extend your battery life.
Why Pressure is a Game-Changer
Setting your fat ebike tire pressure isn't just about preventing flats. It's the single most impactful adjustment you can make to your bike's performance. Getting it right or wrong affects everything from how the ebike feels to how long the battery lasts.
More Than Avoiding Flats
Safety & Control: Tire pressure directly controls traction. If you run your pressure too high on a loose gravel trail, the tire becomes too firm to conform to the ground, reducing the contact patch and causing it to skip and slide. On the other hand, if your pressure is too low on pavement, the tire sidewalls can fold during aggressive cornering, leading to a vague, squirmy feel that hurts control.
Ride Comfort: Your massive tires are your primary form of suspension. At high pressures, they transmit every bump and vibration from the ground directly into the handlebars and saddle, creating a harsh, chattering ride. At lower, correct pressures, the tire casing deforms and absorbs impacts, providing a plush, cushioned feel that smooths out rough terrain.
Battery Range & Efficiency: This is a critical point for e-bike owners. Tire pressure has a direct and measurable impact on rolling resistance. When pressure is low, the tire flattens against the ground, increasing the size of the contact patch. On hard surfaces, a larger contact patch creates more friction, forcing the motor to work harder to maintain speed. This extra effort can noticeably reduce your battery range on a long commute. Higher pressure on pavement minimizes this resistance, maximizing your distance per charge.
Tire & Rim Health: While low pressure is great for soft surfaces, running it too low on trails with rocks and roots is a recipe for disaster. Hitting a square-edged rock can compress the tire so much that the rim smashes through to the ground. This can cause a pinch flat by pinching the tube against the rim or, far worse, dent or crack your expensive rim.

The Master Guide: Finding Your PSI
The quick reference chart is a great start, but it's missing the single most important variable: you. A rider's weight is the primary factor determining how much air is needed to properly support the bike. A heavier rider needs more pressure to achieve the same tire profile and performance as a lighter rider.
Detailed PSI Chart: Weight vs. Terrain
This chart provides a more accurate starting point by factoring in your total system weight (you + your gear). Find your weight range in the left column and cross-reference it with your intended terrain to find your recommended starting PSI.
| Rider Weight (with gear) | Pavement / Hardpack | Mixed Trail / Gravel | Soft Sand / Deep Snow |
|---|---|---|---|
| < 150 lbs (68 kg) | 18-22 PSI | 11-15 PSI | 5-7 PSI |
| 150-200 lbs (68-91 kg) | 20-25 PSI | 14-18 PSI | 6-9 PSI |
| 200-250 lbs (91-113 kg) | 24-28 PSI | 16-20 PSI | 8-11 PSI |
| 250+ lbs (113+ kg) | 26-30+ PSI | 18-22+ PSI | 9-12+ PSI |
Other Critical Factors
While terrain and rider weight are the two biggest factors, a few other variables can influence your ideal pressure.
Tire Width & Volume: A wider 4.8-inch tire has more air volume than a 4.0-inch tire and can therefore be run at a slightly lower pressure to achieve the same feel. A tubeless system can safely be run at lower pressures (1-3 PSI lower) without the risk of pinch-flatting a tube, enhancing grip and comfort. The bike itself, with its heavy motor and battery, adds significant load, which we'll cover next.
The Art of Fine-Tuning
The charts give you the numbers, but the real magic happens when you learn to translate those numbers into feel. Becoming a master of your fat ebike tire pressure means learning to listen to your bike and understand the feedback it's giving you. Experts agree that finding the perfect pressure is a process of methodical experimentation, and it's a skill worth developing.
The Feel Method
This is about developing a sensory connection to your bike's performance. Use the charts to get close, then use this method to get it perfect.
Tuning for Pavement: The goal here is efficiency without being overly harsh. Start with the chart's recommendation (e.g., 22 PSI for a 190 lb rider). Ride a familiar loop. Does the bike feel sluggish or slow to accelerate? Does it drag in corners? If so, it's too low. Add 2 PSI. Ride the loop again. Does it feel faster and more responsive? Good. Now, try another 2 PSI. Keep repeating this. Eventually, you'll hit a point where the ride feels harsh. You'll feel every crack in the pavement, and the bike will chatter over small bumps. This is too high. Drop the pressure back by 1-2 PSI. This is your pavement sweet spot: fast and efficient, but still comfortable.
Tuning for Trails: The goal here is maximum grip and control without risking rim damage. Start with the chart's trail recommendation (e.g., 15 PSI). Find a trail section with roots, rocks, and maybe a short, loose climb. Does the bike feel like it's deflecting or bouncing off obstacles instead of absorbing them? Do you lose traction on the climb? If so, your pressure is too high. Let out 1-2 PSI. Ride it again. If the bike feels more planted and claws its way up the climb, you're getting warmer. The lower limit is found when you feel or hear a thump of the rim hitting a rock on a square-edged hit, or if the tire feels like it's folding over on itself in a hard corner. If this happens, you've gone too far. Immediately add 2 PSI back in to protect your rims.
Visualizing the Contact Patch
A simple way to understand tire pressure is to visualize the shape of the tire that's touching the ground: the contact patch.
High PSI (Pavement): At higher pressures, the tire holds its round shape. The contact patch is small, long, and narrow, much like a road racing tire. This minimizes friction and rolling resistance, which is perfect for maximizing speed and battery range on smooth surfaces.
Low PSI (Sand/Snow): At very low pressures, the tire flattens out significantly. The contact patch becomes wide and square, like a snowshoe. This spreads the weight of you and your heavy e-bike over a much larger surface area, allowing you to float on top of soft sand or snow instead of digging in and getting stuck. This larger patch also provides an incredible amount of grip.
The E-Bike Difference
Your fat e-bike is not a standard fat bike. The addition of a motor and battery typically adds 20-30 lbs (9-14 kg) of electric bike weight. This extra mass needs to be supported, and your tires are the first line of defense.
The 2-4 PSI Rule: As a general rule of thumb, we recommend adding 2-4 PSI to whatever pressure you might run on a non-electric fat bike for the same conditions. This extra air provides the necessary support for the heavier frame, preventing the tires from feeling overly squishy and protecting against rim strikes.
Front vs. Rear Pressure: Your weight is not distributed evenly on the bike. The rear tire supports the majority of your body weight plus, in many cases, the weight of a rear hub motor. Because of this, it's a best practice to run your rear tire at a slightly higher pressure than the front. A good starting point is to set the rear tire 2-3 PSI higher than the front. This allows the rear to roll efficiently and support the load, while the slightly softer front tire can focus on absorbing bumps, steering accurately, and maximizing grip.
Essential Tools for the Job
Relying on guesswork is a common mistake. To properly manage your fat ebike tire pressure, you need the right tools. Investing in these two small items will pay massive dividends in ride quality.
Your Most Important Tool
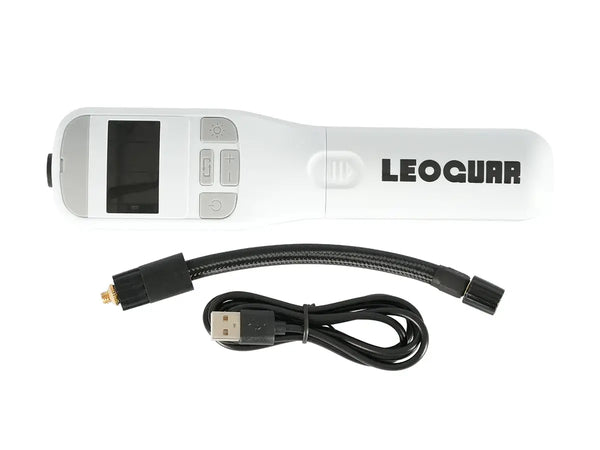
A quality low-pressure gauge is non-negotiable. A standard gauge from a gas station or one designed for high-pressure road tires is useless for fat bikes. The increments are too large, and they are highly inaccurate in the 0-30 PSI range where you operate. A 2 PSI difference is a massive change on a fat tire, and you need a tool that can measure it accurately. Look for a dedicated digital or analog low-pressure gauge that is easy to read in 1 PSI increments.
The Right Pump
Fat bike tires are high-volume, not high-pressure. You need a pump that can move a lot of air with each stroke.
Floor Pump: For home use, a floor pump with a large barrel and a built-in, easy-to-read low-pressure gauge is the gold standard. Look for models labeled HV (High Volume). It will fill your tires much faster and with less effort than a standard pump.
Hand Pump: For on-the-trail adjustments, you need a portable tire pump. Again, choose a compact HV model. It will take some work to fill a tire from flat, but it's perfect for adding or removing a few PSI to adapt to changing trail conditions.
Common Mistakes to Avoid
We see the same few mistakes trip up new fat e-bike riders time and again. Avoid these common pitfalls, and you'll be ahead of the curve.
Ignoring the Sidewall
Every tire has a pressure rating printed on its sidewall, often stating Max PSI: 30 or similar. Many riders mistakenly inflate their tires to this maximum number. The max PSI is a safety limit, not a riding recommendation. It's the absolute highest pressure the tire can hold before risking a blowout. Your optimal fat ebike tire pressure will almost always be significantly lower than this number.
Set It and Forget It
The beauty of a fat e-bike is its versatility. But to unlock that versatility, you must adjust your pressure. Riding on the beach with the same 25 PSI you use for your commute will result in a miserable, trench-digging experience. Taking two minutes to drop your pressure to 8 PSI will transform the ride. Always carry a small gauge and pump so you can adapt to the terrain you're about to conquer.
Trusting the Thumb Squeeze
On a high-pressure road tire, you can get a rough idea of pressure by squeezing the tire. On a fat tire, this method is completely useless. The difference between a perfectly dialed 8 PSI for snow and a rock-hard 12 PSI is impossible to feel with your thumb. A 1-2 PSI change can be the difference between floating and floundering, and only a proper gauge can tell you where you are.
Forgetting About Temperature
Air expands when it's hot and contracts when it's cold. This basic physics has a real-world effect on your tires. As a rule, for every 10°F (5.6°C) change in ambient temperature, your tire pressure will change by approximately 1 PSI. If you set your tires to 10 PSI in a warm 70°F garage and then go riding in 30°F winter weather, your pressure will have dropped to around 6 PSI before you even start. Always check your pressure right before you ride, especially during seasons with large temperature swings.
Final Thoughts and Your Next Ride
Your Pressure, Your Ride
Mastering your fat ebike tire pressure is the fastest, cheapest, and most effective upgrade you can give your bike. It costs nothing but a few minutes of your time and a little bit of attention.
The charts in this guide are your map, but your own experience is the territory. Use our numbers as the starting point for your exploration. Pay attention to how the ebike feels, sounds, and reacts. Don't be afraid to stop mid-ride and let a little air out or add a little in. That small adjustment could be the key that unlocks a perfect ride.
Now, grab your gauge, get out there, and experiment. Your best ride ever is just a few PSI away.
Frequently Asked Questions
Q: How often should I check my fat ebike tire pressure?
A: Check your tire pressure before every ride, especially if you're switching between different terrains. Temperature changes and natural air loss can affect pressure significantly over time.
Q: Can I use a regular bike pump for my fat tire e-bike?
A: While you can use a regular pump, it's not ideal. Fat tires require high volume, low pressure pumps (HV pumps) that move more air with each stroke, making inflation much easier and more efficient.
Q: What happens if I run too low pressure on pavement?
A: Running too low pressure on pavement increases rolling resistance, drains your battery faster, makes steering feel sluggish, and can cause the tire sidewalls to fold during cornering, compromising safety and control.
Q: Should my front and rear tires have the same pressure?
A: No, your rear tire should typically run 2-3 PSI higher than the front. The rear supports more weight (including the motor in many e-bikes) while the front tire benefits from slightly lower pressure for better steering and bump absorption.
Q: How do I know if my tire pressure is too high for trail riding?
A: If your bike feels like it's bouncing off obstacles instead of absorbing them, loses traction on climbs, or feels harsh and chattery over bumps, your pressure is likely too high. Reduce by 1-2 PSI and test again.


Leave a comment