4 Bike Trailer for Kids Mistakes Every Parent Makes
Why Family Cycling Safety Goes Beyond Just Wearing a Helmet
Riding bikes with your family is fun and gives you freedom. But when you bring your child along, one big question comes up: "How do I keep my child completely safe?" This is the right thing to ask. We want to help you learn more than just "wear a helmet" advice.
This guide talks about big mistakes people make with equipment, daily use, and thinking that can hurt safety when using a bike trailer for kids or similar bike attachment. We will look at common errors with bike compatibility, safety straps, checking if your child is ready, and being aware on the road to help you ride safely.
Mistake #1: Bike & Hitch Compatibility
This is the biggest error. Thinking any trailer works with any bike can cause equipment to break. Learning the technical details stops a costly and dangerous mistake, helping you check your own bike and ask the right questions before buying.
The Danger of Assumption
Thinking "my bike has wheels, so it should work" is dangerous and too simple. Not all bike frames, axle types, or brake systems work with every bike trailer for kids. For example, disc brakes can get in the way of certain hitch mounts, needing special adapters to create enough space. We have seen riders have trouble with this after buying, when it should have been the first thing to check. Here are some common bike types that often have compatibility problems:
- Full-suspension mountain bikes: The movement of the rear suspension can change the trailer's position and put unwanted stress on the bike's frame and moving parts.
- Carbon fiber frames: Many hitch attachments, especially frame-mounted ones, use clamping forces that can crack or crush delicate carbon tubing. Most companies will cancel warranties if these attachments are used.
- Certain e-bikes and modern bikes: These may have non-standard rear hubs, wider "Boost" spacing, or unique dropout designs that do not work with standard hitch cups.
The Hitch is Everything
The hitch is the most important connection point. There are two main ways to attach a bike trailer for kids, each with its own things to think about.
| Hitch Type | Pros | Cons | Best For |
|---|---|---|---|
| Axle-Mounted | Nearly universal fit on standard bikes; creates a low, stable center of gravity. | Can be complex with modern thru-axles, often requiring special adapters. | Most standard commuter, hybrid, and hardtail bikes; ideal for touring. |
| Frame-Mounted | Very quick to attach and detach; does not interfere with the rear axle. | Less common; potential for frame incompatibility and paint damage if not fitted perfectly. | Specific commuter bike models designed to accept this system. |
The Critical Check
Your first step is not to look at trailers, but at your own bike. As noted by the experts at Bicycling.com, "knowing your bike's axle type and whether you have disc brakes is the first step in choosing a safe bike trailer." Before you buy, always find the trailer maker's compatibility guide on their website. Compare its needs directly against your specific bike model, frame material, axle type (Quick-Release or a specific Thru-Axle size like 12x142mm or 12x148mm), and brake system. If you are not sure, contact the company's support with photos of your bike's rear dropout area.

Mistake #2: Improper Harnessing & Loading
This talks about the most common daily usage errors that directly affect child safety during a ride. Getting these details right gives clear, life-saving security, stopping rollovers and injuries from sudden stops or bumps.
The "Loosey-Goosey" Harness
A 5-point harness is the best choice for a reason: it holds the child at the shoulders, hips, and between the legs, stopping them from slumping or being thrown out in a worst-case situation. A loose harness is a serious problem.
Our experience has taught us the "pinch test" is the best way to check fit. After buckling your child in, try to pinch a horizontal fold of webbing at their collarbone. If you can pinch the strap, it is too loose. A snug harness is a safe harness. It should not be uncomfortably tight, but it must be firm enough to hold the child securely against the seatback. Always make sure the shoulder straps come from a slot at or just above your child's shoulder level. Always check that the crotch strap is buckled and the waist straps are snug across their hips.
Unbalanced & Overloaded
The science is simple: an unbalanced or overloaded trailer is an unstable one. It is important to respect the maker's stated weight limit. Most two-child trailers can hold around 100 lbs / 45 kg, but some budget models can be as low as 80 lbs. This limit includes the child plus any cargo. Never guess; check the sticker on the trailer frame or in the manual.
When loading gear, follow this rule: place heavier items low and as far forward as possible, ideally in front of the trailer's axle. Putting a heavy backpack in the rear cargo area or hanging bags off the back of the trailer raises the center of gravity and can cause dangerous fishtailing or even a rollover during a turn. Following all maker weight and loading instructions is a key part of the U.S. Consumer Product Safety Commission (CPSC) guidelines for bicycle safety.
Mistake #3: Child Readiness vs. "Good Enough"
This common mistake challenges parents to think beyond physical hardware and consider the child's development readiness, comfort, and emotional state. This view raises safety from a simple checklist to a complete, child-focused practice, making sure bicycling is a positive experience for everyone.
Age vs. Ability
The common advice to start using a bike attachment for kids at 12 months is too simple. Age is not the main factor; ability is. The true requirement is strong, independent head and neck control. To ride safely, a child must be able to sit upright without support for the whole ride while also carrying the weight of a properly fitted helmet.
The American Academy of Pediatrics (AAP) stresses that a properly fitted helmet is essential, and by extension, a child's ability to hold their head up with a helmet on is a non-negotiable requirement for any form of bike transport. If your child's head slumps forward or to the side with a helmet on, they are not ready. If you have any doubts, we strongly advise talking to your pediatrician.
Forcing the Fun
A successful family ride is a happy one. Ignoring a child's signs of fear or discomfort can create a negative feeling with cycling that is hard to undo. It is not always about loud crying. We have learned to watch for the subtle signs: a child always leaning to one side to avoid bumps, repeatedly trying to wiggle out of the straps, or a fixed, wide-eyed stare. This is not just a bad mood; it can show an uncomfortable seat, a jarring ride, or real distress.
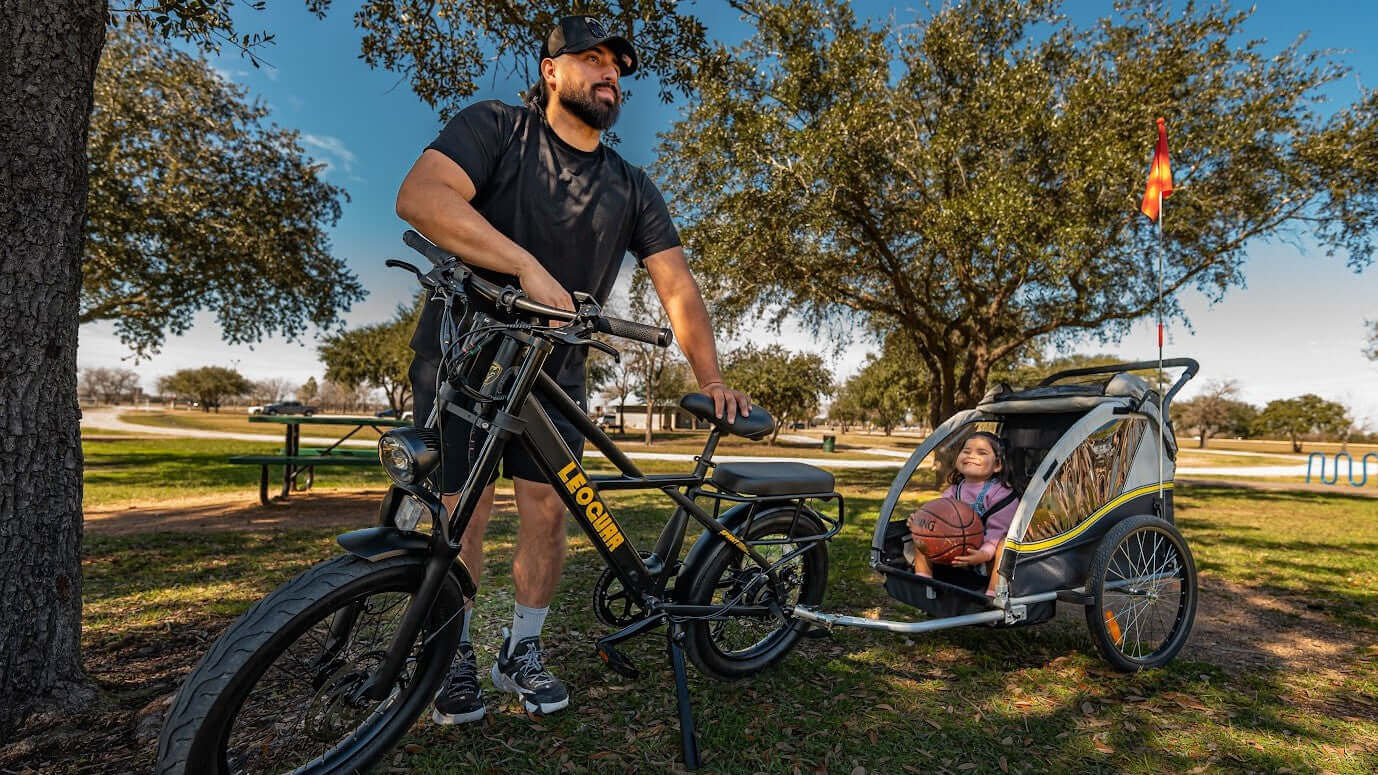
Our most important lesson has been that a series of short, happy rides builds more confidence than one long, miserable one. Start with 5-10 minute trips around a quiet park or neighborhood. Make it an adventure by bringing a favorite small toy or snack. Talk during the ride, pointing out dogs, trees, and birds. Turning the ride into a positive, engaging experience is just as important as any piece of safety equipment.
Mistake #4: Forgetting You're a "Long Vehicle"
This mistake category covers situational awareness—the mental errors that happen during the ride. These are often forgotten in equipment-focused guides but are critical for navigating the real world safely with a bike trailer for kids.
Turning Radius & Width
When you attach a trailer, you basically double your vehicle's length and significantly increase its width. Forgetting this is the beginner's blind spot. This leads to a few classic, avoidable errors:
- Cutting a corner too sharply and catching the inside trailer wheel on a curb, which can cause a jarring bump or even a tip-over.
- Weaving between obstacles like bollards, benches, or signposts without leaving enough clearance for the trailer's wider profile.
- Moving the bike on foot and forgetting about the trailer behind you, causing it to jackknife or bump into objects or people.
We insist that your first few outings happen in an empty parking lot. Practice making wide, sweeping turns in both directions. Weave through imaginary obstacles. Get a feel for the "ghost" you are now pulling. This practice is as important as learning to use your brakes.
Out of Sight, Out of Mind
A low-profile bike trailer for kids sits directly in a car's blind spot. You must assume you are invisible and take active steps to be seen. The following items are not optional accessories; they are essential safety systems.
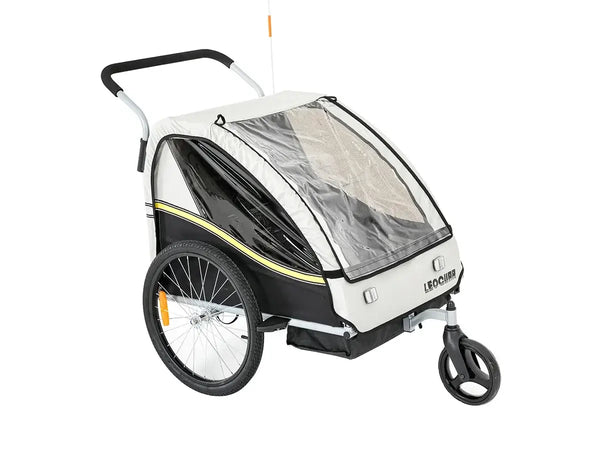
- The safety flag is non-negotiable. It must be used on every single ride. Its height makes it visible to drivers over the hoods of their cars.
- A brightly colored trailer in yellow, orange, or red is significantly more visible than a black or grey one.
- Reflective tape should be added to the sides and rear of the trailer frame and wheels.
- Lights are crucial. Use a flashing red light mounted directly on the rear of the trailer itself, not just on your bike's seat post.
While not legally required for trailers, following the principles from federal guidelines for bicycle visibility, such as using lights and reflectors day and night, is a best practice for being seen and staying safe.
Smart Route Selection
Not all bike paths are created equal, and not all are trailer-friendly. Avoid paths that are too narrow, crowded with pedestrians, or have root-buckled pavement and sharp, blind corners. The bumps and jolts that are minor annoyances for you can be jarring and frightening for a small passenger.
We recommend scouting a new route once by yourself before taking the kids. This allows you to check the pavement quality, traffic patterns, and potential hazards. This aligns with general advice from the National Highway Traffic Safety Administration (NHTSA) on defensive cycling and minimizing risk by choosing safer routes.

The Ultimate Pre-Ride Safety Checklist
Discipline creates safety. Turn these steps into a non-negotiable, two-minute ritual you perform before every single ride. It is the final layer of protection that catches wear-and-tear issues before they become on-road failures.
- Hitch Check: Grab the hitch arm and wiggle it firmly. There should be no play or looseness at the connection point to your bike. Make sure the safety strap is looped around the bike frame and securely fastened.
- Tire Pressure: Squeeze the trailer's tires. They should be firm to the touch. Under-inflated tires increase rolling resistance and make the trailer more likely to get pinch flats and instability. Check the recommended PSI on the tire sidewall and inflate accordingly at least once a week.
- Harness & Helmet: Place your child in the seat. Click every buckle of the 5-point harness and perform the "pinch test" at the collarbone to make sure it is snug. Put on their helmet and adjust the straps so it sits level on their head and is secure.
- Flag & Lights: Confirm the safety flag is securely mounted in its holder. Turn on your rear flashing light, even during the day.
- Contents Secure: Make sure any toys, snacks, or cargo are secured inside the trailer and cannot fall out or interfere with the wheels.
- The "Roll Test": Finally, roll the bike and trailer forward a few feet. Listen for any unusual rubbing or clicking sounds and watch to make sure the wheels spin freely.
This simple ritual is your commitment to your child's safety. It transforms you from a casual rider into a responsible operator, making sure every family ebike ride is as safe as it is fun.
Frequently Asked Questions
1. Q: At what age can my child start riding in a bike trailer for kids?
A: Age is less important than ability. Your child needs strong, independent head and neck control and must be able to sit upright while wearing a helmet for the entire ride. Most children develop this ability around 12 months, but some may need to wait longer. Always consult your pediatrician if you have doubts.
2. Q: How do I know if my bike is compatible with a bike trailer for kids?
A: Check your bike's axle type (Quick-Release or Thru-Axle), brake system (rim or disc), and frame material before shopping. Always consult the trailer manufacturer's compatibility guide and compare it to your specific bike model. When in doubt, contact the manufacturer with photos of your bike's rear dropout area.
3. Q: What's the most important safety feature to look for in a bike attachment for kids?
A: A 5-point harness system is essential. It secures your child at the shoulders, hips, and between the legs. Also look for a sturdy hitch system, safety flag, and reflective materials. The trailer should meet safety standards and have clear weight limits.
4. Q: How tight should the harness be in a bike trailer for kids?
A: Use the "pinch test" - after buckling your child in, try to pinch a horizontal fold of webbing at their collarbone. If you can pinch the strap, it's too loose. The harness should be snug enough to hold your child securely against the seatback without being uncomfortable.
5. Q: What should I do if my child seems scared or uncomfortable in the bike trailer for kids?
A: Start with very short rides (5-10 minutes) in quiet areas. Watch for signs like leaning away from bumps, trying to escape the straps, or wide-eyed staring. Make rides fun with toys, snacks, and narration. If fear persists, wait a few weeks and try again. Never force a frightened child to ride.


Leave a comment