





How to Tighten a Bike Brake Lever?
When the brake lever on your bike seems loose, it is generally because of one of three problems: the lever is pulled too near to the handlebar, the brake has a spongy feel, or the lever clamp is loose. The appropriate solution will vary according to the specific problem.
Make sure you check the lever before you tighten anything, so that you don't end up adjusting the wrong component.
A) Is the lever spongy or does it pull too close to the handlebar? This is the most usual problem, indicating that there is too much play. With cable brakes, the cable is loose; with hydraulic brakes, there could be air in the lines.
B) Is the lever difficult to pull or stiff? This is the other problem: the system is too tight, or excessive friction is caused by a dirty or frayed cable. The solution is the same but carried out in reverse.
C) Does the lever move up and down or from side to side? This has no effect on the braking power, which means that the lever assembly is not secured tightly to your handlebar and the clamp is loose.
Use this simple checklist to find your solution:
| If Your Symptom Is... | The Likely Cause Is... | Go To This Section |
|---|---|---|
| Spongy pull, lever hits grip | Slack brake cable or air in hydraulic line | Method 1 (Cable) or Method 2 (Hydraulic) |
| Entire lever unit moves on the bar | Loose mounting clamp bolt | Method 3: Securing a Physically Loose Lever |
| Lever feels stiff or grabs instantly | Cable is too tight | Method 1 (Cable), but loosen instead of tighten |
When the well-adjusted lever is correctly adjusted it should seem solid and give a quick response. The brake pads should start to engage roughly halfway along the movement of the lever. However, even if you press the lever firmly it must not make contact with the handlebar grip.
Essential Tools to Tighten a Bike Brake Lever
Having the correct tools at hand means that keeping your commuter electric bike in good condition will be easier. You don't need a complete workshop, for a decent bike multi-tool generally includes all the items you'll need.
Must-Haves:
For brake adjustments the 4mm and 5mm sizes of hex wrenches are most common. As to pliers, although they are often optional they do come in handy for gripping and tightening the brake cable and needle-nose pliers are the best.
For Specific Brake Types:
For screwdrivers, some of the older brake levers have a Phillips or flathead screw for the clamp. A torque wrench is strongly advised, in particular when fitting carbon handlebars or other components, since overtightening may damage the carbon fiber or cause the aluminium threads to strip.
It's a good idea to use a repair stand when you are getting started with your bike; if you don't have one, then you can lean the bike firmly against a wall.
Method 1: Tighten a Bike Brake Lever Cable Tension
When the lever feels spongy and you need to pull it way out to get the brakes to engage, you probably have slack in the brake cable. You can fix this by simply fine-tuning or doing a more complete reset.
The Quick Fix: Barrel Adjuster
- To find the barrel adjuster: look for it on the body of your brake lever or on the brake caliper itself.
- To tighten the cable: in order to increase the tension in the cable and cause the brake to engage more quickly, turn the barrel adjuster in a counter-clockwise direction. This has the effect of lengthening the cable housing and thus tightens the inner cable.
- Make small adjustments: turn it by only a half-turn at a time.
- Check the lever: After making each small adjustment, press the brake lever and you should notice a solid engagement roughly halfway along the pull.
- Lock it Down: Next to most barrel adjusters there is a thin lockring. Once you've settled on the way it feels, turn the lockring clockwise until it is snug against the lever or caliper body.
It prevents the adjuster from vibrating loose. However, if you have unscrewed the barrel adjuster more than halfway and the lever is still loose, then proceed to the major fix.
The Major Fix: Caliper Pinch Bolt
Apply this method when the barrel adjuster has been turned to its maximum setting. You'll also have to use it after fitting a new brake cable or if the cable has stretched considerably over time. It serves to reset the main anchor point of the cable.
For Rim Brakes (V-Brakes & Caliper Brakes)
- To reset the barrel adjuster: turn the barrel adjuster all the way in (in the clockwise direction) until it reaches a stop. This will give you the greatest range for fine-tuning later.
- To loose the Pinch Bolt: Find the bolt on the brake caliper arm which clamps the brake cable and use an Allen key of the correct size (it is usually 5mm) to loosen it slightly so that the cable can slide free.
- Adjust the Pad Position: Using one hand, push the two brake caliper arms together until the brake pads are in close contact with the wheel rim.
- To pull and tighten the cable, use pliers to remove the excess length from it. Make sure the cable is tight and that the pads are in contact with the rim, and then securely retighten the pinch bolt.
- Release the caliper and turn the wheel to make certain that it moves freely without the pads rubbing.
- Set the brakes: after having adjusted the tension, ensure that the pads make solid contact with the rim and are the same distance from each side.
For Mechanical Disc Brakes
- Reset the Barrel Adjuster: Turn it clockwise until it stops.
- Loosen the Pinch Bolt: Find the pinch bolt on the caliper's actuator arm (the moving part that the cable pulls). Loosen it with an Allen key.
- Pull and Tighten: Pull the cable tight with pliers and re-tighten the pinch bolt.
- Check Pad Spacing: Pad spacing is important for mechanical disc brakes. Most manufacturers recommend a gap of about 0.2 to 0.4 mm between the pads and the rotor to prevent rubbing.
- Fine-Tune: Use the barrel adjuster for the final tension setting.
Method 2: Adjust Hydraulic Bike Brake Levers Correctly
If your bike has hydraulic brakes, there is no cable to tighten. These systems use fluid to transfer force. If the lever feels "loose," it usually means the lever's reach or free stroke needs adjusting, or there is air in the system.
Adjusting Lever Reach
- Find the Adjuster: On the lever body, look for a small dial or a small screw situated close to the pivot point where the lever blade joins it.
- To make the adjustment: With many Shimano and SRAM levers you need an Allen key of 2mm or 3mm size; when you turn the screw the lever blade will move either closer to or farther from the handlebar.
Although different brands have slightly different mechanisms, the basic principle is the same: adjust the lever so that you can hold it comfortably and firmly with one or two fingers.
When Spongy Means a Bleed
If you've adjusted the reach and the lever still seems spongy and pulls all the way to the bar, there is probably air in the brake lines. This is similar to having a loose cable in hydraulic brakes, since air is compressible and when you pull the lever you are therefore compressing the air bubbles rather than pushing the fluid to the caliper.
In order to correct this, you have to carry out a 'brake bleed'. This involves forcing new fluid through the system in order to get rid of all the air bubbles. It is an advanced job and requires a special bleed kit for your particular brake model (for example, Shimano, SRAM, or Magura). Although this guide doesn't include the entire procedure, it is important to be aware of the symptom.
The best thing to do when carrying out this job is to either go through a detailed tutorial or seek advice from a professional mechanic.
Method 3: Secure and Tighten a Loose Bike Brake Lever
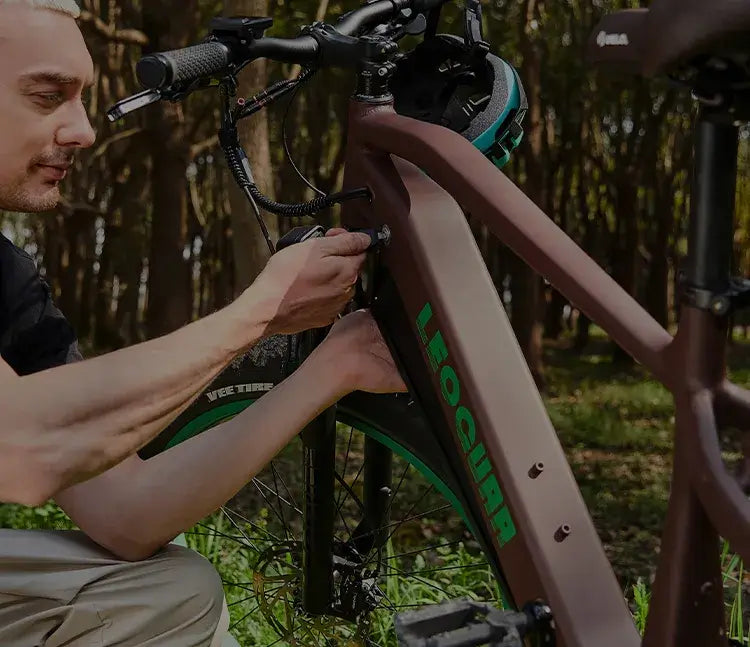
- To find the Clamp Bolt: Look for the Allen bolt which clamps the lever body to the handlebar. On most flat-bar mountain or hybrid bikes this bolt is located on the under side of the clamp.
- Set the lever: Before you tighten it, place the lever at a right angle. A good starting point is to draw a straight line from your forearm, through your wrist and hand, to your fingers, as they normally appear when you're riding.
- To tighten the clamp bolt: use the right size Allen key and tighten the bolt securely. The lever must be secure so that it does not move when subjected to hard braking, but it should not be tightened to the point of damaging the handlebar.
- When using a torque wrench (particularly one when dealing with carbon handlebars), it is necessary to always do so; most brake lever clamps have the torque specification printed on them, typically ranging from 4 to 6 Nm.
Over-tightening may crush a carbon bar and lead to its failure. Tighten the bolt to the torque value recommended by the manufacturer.
Common Mistakes to Avoid
While you are working, be aware of these common mistakes if you are to ensure that your adjustment is a success.
If you tighten the pinch bolt too much it may strip the threads in the aluminium caliper or cause the bolt head to break. Just tighten it firmly, not with force.
If you forget to tighten the lockring when making an adjustment, the vibrations caused by riding will cause the barrel adjuster to turn on its own and your brakes will soon become unadjusted again.
If the lever seems spongy and you've already checked all the adjustments, then check your brake pads; as the pads wear down, the caliper's pistons or arms have to travel a greater distance in order to make contact.
A lever that is 'loose' may simply indicate that the pads need replacing. Incorrect Lever Angle: If the levers are positioned too high or too low, you risk experiencing wrist pain and fatigue after long rides. You should always adjust the levers to the ergonomic angle specified in Method 3.

Final Checks & Test Drive
Once you are finished making your adjustments, do a final safety check by firmly squeezing both brake levers. They should feel firm, fall short of the handlebar and the lever clamps should not move.
Raise the front part and then the rear part of the bike and turn each wheel. The wheels should rotate easily without making any rubbing noise from the brake pads. Lastly, take a careful test ride in a safe area free from traffic.
Slow down and check the front and rear brakes separately. Ensure that they provide you with smooth, predictable, and powerful braking so that you can ride with confidence.
Frequently Asked Questions
1. Q: How frequently should I check the tension of my brake lever?
You ought to check your brake lever tension each time you go riding as part of your routine safety check; pay attention to how the lever feels when you squeeze it. If you find that the lever is pulling in towards the handlebar more than normal or has a spongy feel, then it's time to make the necessary adjustments.
2. Q: Is it possible to use any kind of pliers to tighten the brake cable?
A: Although regular pliers can be used, needle-nose pliers are best when making adjustments to brake cables since they provide a better grip and more control when pulling the cable taut. It is important to avoid using pliers with teeth as these might damage the cable strands.
3. Q: What is the right thing to do if my brake lever still seems loose after having tried all of these methods?
If the brake lever still seems loose after having carried out these steps, you could have worn brake pads, a cable that has stretched or frayed and therefore needs replacing, or there may be internal damage to the brake mechanism; in such a situation it is best to have your bike examined thoroughly by a professional mechanic.
4. Q: Is it usual for new brake cables to stretch and require adjustment?
A: Yes, new brake cables typically stretch during the first few rides, which can make your brake lever feel loose again. This is completely normal. You may need to readjust the cable tension using the barrel adjuster or pinch bolt method within the first week of installing new cables.
5. Q: How tight should I make the brake lever clamp bolt?
A: The brake lever clamp bolt should be tight enough that the lever doesn't move when you apply hard braking force, but not so tight that you risk damaging your handlebar. If you have carbon handlebars, always use a torque wrench and follow the manufacturer's specifications, typically 4- 6 Nm. For aluminum handlebars, tighten firmly by hand but don't over-torque.


Leave a comment