Electric Bike Rotors: How to Know When to Replace Them
Why Your Electric Bike Rotors Matter
Your electric bike rotors keep you safe. They turn your brake's squeezing power into the friction that stops your bike when you need it most. E-bikes go faster and weigh more than regular bikes, so knowing when to replace rotors isn't just about keeping your bike running—it's about staying safe every time you ride.
You need to watch for four main warning signs: loud noises, visible damage, weak braking, and physical wear. Ignoring these signs can make your brakes work poorly or fail completely. This guide will show you how to check your rotors in just a few minutes and how to replace them when needed.
The Four Warning Signs
Many riders ask "how to know when to replace ebike rotors?" Your bike usually gives you clear signals. You can spot most problems just by looking, listening, and feeling without any special tools.
Sign 1: Visible Damage
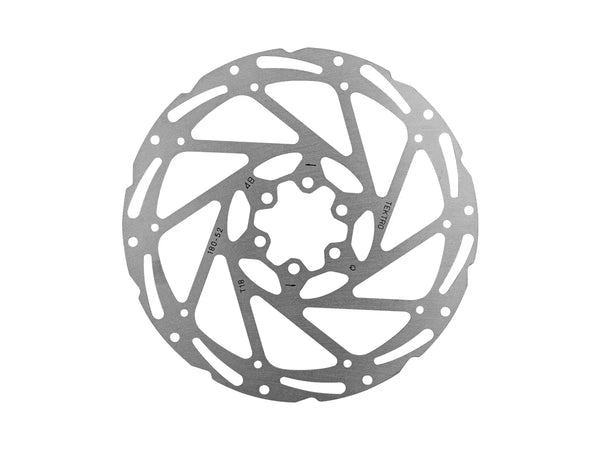
A quick look can tell you a lot about your rotor's condition. Check for these damage signs:
- Warping or Bending: Your rotor should be perfectly straight for smooth braking. A warped rotor will wobble side to side as your wheel turns. This often causes a rhythmic rubbing sound even when you're not using the brakes.
- Deep Grooves and Scratches: Look closely at the braking surface. Light, even lines are normal, but deep scratches or grooves you can easily see mean trouble. This shows uneven wear or that rough material has damaged the surface.
- Heavy Discoloration: Some brown or straw-colored marks from heat are normal. However, dark blue, purple, or rainbow colors mean the rotor got too hot. This "burnt" look means the metal became weak and brittle, making it more likely to break.
Sign 2: Sound Problems
Your brakes shouldn't be silent, but some sounds mean you need help. Listen for these warning noises:
- Grinding or Scraping: This isn't the same as normal brake squealing. A harsh, metal-on-metal grinding sound is serious trouble. It usually means your brake pads wore down to their metal backing, which is now destroying your rotor.
- Constant Rubbing: A steady "shing-shing-shing" sound with every wheel turn, even when you're not braking, means a warped rotor. The bent part hits the electric bike brake pads as it spins.
Sign 3: Feel the Problem
How your brakes feel gives you important information. Watch for these feelings:
- Pulsing at the Brake Lever: This comes from a warped rotor. When you brake, the bent section pushes the pads apart and then lets them close again. You'll feel the lever pushing back against your fingers in a rhythm as the warped part passes through the brake. It's a clear "thump-thump-thump" feeling that signals trouble.
- Weak Braking Power: If your brakes feel weaker and you need to squeeze harder for the same stopping power, especially on long hills, your rotors might be the problem. A rotor that's too thin or has been overheated can't handle heat well, leading to dangerous brake fade.
Sign 4: The Fingernail Test
This simple trick gives you a surprisingly good check of rotor wear without any tools. Many bike mechanics use this quick fingernail test to diagnose problems fast. Run your fingernail from the inner, unused part of the rotor out to the edge. If your nail catches on a clear lip or ridge at the outer edge of the braking area, it means a lot of material has worn away. This ridge exists because the brake pad doesn't cover the whole rotor surface, and a big ridge means the rotor is getting thin.
Measuring Rotor Thickness
The four signs above work great, but measuring thickness gives you the most accurate answer. This removes guesswork and gives you solid facts.
Why Thickness Matters
As brake pads wear down a rotor, it gets thinner. A thin rotor has less material to absorb and spread out heat, making it much more likely to overheat and fade. It's also weaker and more likely to warp or crack under the heavy braking forces common with e-bikes.
The Right Tool
You need digital calipers to get an accurate measurement. This tool lets you measure rotor thickness down to tiny fractions. They're affordable and invaluable for any cyclist who wants to do their own maintenance.
How to Measure
- Find the Minimum Thickness: Most rotors have their minimum thickness laser-etched on the surface. Look for markings like "Min. TH 1.5mm"—this is the manufacturer's safety limit.
- Measure Multiple Spots: Wear isn't always even. Use your calipers to measure thickness at several points around the braking track—the shiny area where pads touch.
- Compare and Decide: Compare your lowest measurement to the manufacturer's spec. If your rotor is at or below minimum thickness, replace it immediately. If no spec is available, replace a rotor that started at 1.8mm thick once it wears to 1.5mm. Most standard rotors from major brands like Shimano start at 1.8mm thick and need replacement at 1.5mm.
Why E-Bike Rotors Wear Faster
Electric bike rotors wear out faster than regular bike rotors, and it's not just about weight. The whole system faces greater forces and higher energy levels, putting unique demands on your braking parts.
It's More Than Weight
While the extra weight of ebike motor and battery matters, the real issue is kinetic energy. Energy increases with the square of speed, meaning even a small speed increase leads to much more energy your brakes must turn into heat to stop you.
Four Wear Factors
- Higher Average Speeds: E-bikes make it easy to go 15-20 mph or more, while casual cyclists might average 10-12 mph. When you need to stop, your brakes work much harder to handle that extra energy.
- Increased Total Weight: It's not just the bike's weight but the total weight of bike, rider, and cargo. A 55lb e-bike with a 180lb rider has much more mass than a 25lb road bike with the same rider, creating more momentum to control.
- Stop-and-Go Riding: Urban e-bike commuters face a tough cycle of speeding up and hard braking. This frequent, intense use creates more heat cycles than casual riding, speeding up wear on pads and rotors.
- Motor and Hub Forces: On e-bikes with rear hub motors, forces from the motor's power and braking system both act on the wheel. This puts extra and different types of stress on the rotor and its mounting points.
How to Replace a Rotor
Once you know you need a replacement, doing it yourself is straightforward with a few common tools. It's a great skill for any e-bike owner to learn.
Tools You Need
- Torx T25 Wrench
- Torque Wrench with T25 Bit (Highly Recommended)
- Isopropyl Alcohol
- Clean Rags or Paper Towels
- New Rotor (correct size and mounting type)
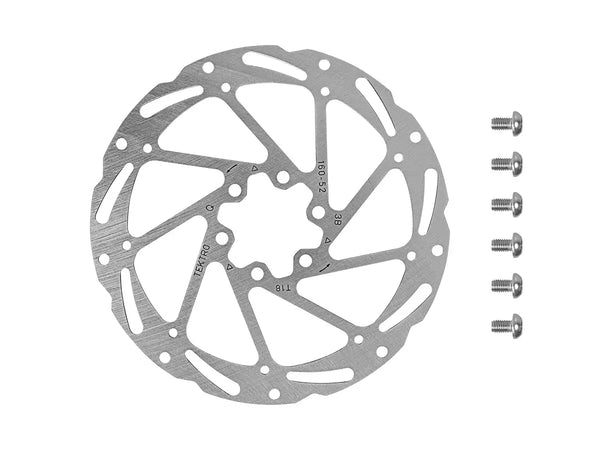
- New Rotor Bolts (often included with new rotor)
Step-by-Step Process
- Remove the Wheel: Take the wheel with the worn rotor off your e-bike.
- Loosen the Bolts: With the wheel on the ground or workbench, use your T25 wrench to loosen the six rotor bolts a quarter-turn each in a star pattern, like changing a car tire. This prevents warping the hub's mounting surface.
- Remove the Old Rotor: Once all bolts are loose, finish unscrewing them and lift the old rotor off the hub.
- Clean the Hub Surface: This is the most important step for trouble-free installation. Spray alcohol on a clean rag and carefully wipe the mounting surface on the wheel hub—a clean surface is the secret to successful rotor installation.
- Install the New Rotor: Place the new rotor on the clean hub. Check for directional arrows on the rotor and make sure they point in the forward wheel rotation direction.
- Tighten the New Bolts: Hand-thread the new bolts to start them, then gradually tighten using the same star pattern with your T25 wrench until snug.
- Torque to Specification: Use a torque wrench to finish like a pro. This ensures even pressure and prevents stripping bolts or damaging your hub—usually 4-6 Newton-meters (Nm).
- Reinstall the Wheel: Mount the wheel back on the bike, secure the axle, and spin it to check for proper clearance and alignment.

Choosing the Right Rotor
Not all rotors are the same. When replacing your e-bike's rotor, you can upgrade for better performance and durability. Understanding your options helps you make a smart choice that improves safety.
| Feature | Standard Rotor | E-Bike Specific Rotor |
|---|---|---|
| Typical Thickness | 1.8 mm | 2.0 mm - 2.3 mm |
| Common Size | 160 mm - 180 mm | 180 mm - 220 mm |
| Heat Management | Good | Excellent |
| Warp Resistance | Fair | Excellent |
| Best Use | Lighter bikes, casual riding | E-bikes, heavy riders, long descents |
Size and Thickness
For e-bikes, bigger and thicker is almost always better. Many e-bikes come with standard 1.8mm thick rotors, but upgrading to 2.0mm to 2.3mm thick provides better heat handling and warp resistance. Similarly, increasing rotor diameter (like from 180mm to 203mm with a simple adapter) increases braking power and provides more surface area to handle heat.
Construction and Materials
Rotors come in one-piece and two-piece designs. Standard one-piece ebike rotors are stamped from a single steel sheet, while two-piece or "floating" rotors use a steel braking track riveted to an aluminum carrier. The aluminum carrier is lighter and spreads heat more effectively than steel, helping keep the braking system cooler under heavy use.
Frequently Asked Questions
Q: Should I replace brake pads when I install a new rotor?
A: Yes, always install new brake pads with a new rotor. Your old pads have worn to match the old rotor's pattern, so using them on a fresh rotor will give poor contact and reduced braking power.
Q: What does "bedding-in" brakes mean?
A: Bedding-in is the important process of breaking in new pads and rotors. It involves doing controlled stops to transfer an even layer of pad material onto the rotor surface for optimal friction and performance.
Q: Can I fix a warped rotor instead of replacing it?
A: Minor wobbles can sometimes be fixed with a rotor truing tool, but if the rotor is badly bent, overheated, or worn close to minimum thickness, replacement is the only safe choice. Trying to straighten a badly damaged rotor is dangerous.
Q: How often should I check my e-bike rotors?
A: Check your rotors monthly for visible damage and listen for unusual sounds during every ride. E-bikes put more stress on braking components, so regular inspection helps catch problems early.
Q: What's the difference between standard and e-bike specific rotors?
A: E-bike specific rotors are typically thicker (2.0-2.3mm vs 1.8mm) and larger in diameter, providing better heat management and durability for the higher speeds and weights of electric bikes.


Leave a comment