


Are Bike Headlights Worth It? Choosing the Right Bike Front Lamp for Safety
Are Bike Headlights Worth It?
Let's answer the main question directly: are bike headlights worth it? Yes, they definitely are. A good bike front lamp is not just an extra part. It's a must-have safety tool, just as important as your helmet. It has two main purposes: it helps you see the road ahead, but more importantly, it makes sure cars, people walking, and other cyclists can see you. This guide will explain the confusing technical terms clearly. We will tell you exactly why a bike headlight is so important and help you pick the right one for how you ride, keeping you safe and confident every time you go out.
The Case for a Headlight
The reason to use a bike headlight is simple: being seen saves lives. Whether you're riding on a dark trail or a bright city street, being visible is your best protection against crashes.
Dangers of "I Can See"
Many people wrongly think you only need a light when you can't see the road. The truth is, the most important job of a bike headlight in many places is to make other people see you. A driver's brain looks for cars and their headlights, not the thin shape of a cyclist. Recent data shows that many cyclist deaths happen in low-light conditions at places that aren't intersections. As National Highway Traffic Safety Administration (NHTSA) data shows, making cyclists more visible is key to stopping these sad accidents. A bright light cuts through all the visual mess of a city and gets attention.
Daytime Running Lights
The safety benefits work well during the day too. Modern bike headlights have special "daytime flash" modes. These aren't just for looks; they use a specific pulse and brightness to catch a driver's eye from far away, even in bright sunlight. Studies show that using a flashing light during the day makes a cyclist much more noticeable to drivers, greatly reducing the chance of a crash. It's a simple habit that changes you from someone who just uses the road into an active, visible presence.
Legal vs. Best Practices
Many places have electric bike light laws requiring a white front light and a red rear light after sunset. But following just the legal minimum isn't enough. Safety best practices, as experienced cyclists and safety experts recommend, go much further than the law. This means using a light not just at night, but during dawn, dusk, in rain, fog, or any time when it's hard to see. The goal isn't to follow rules; it's to stay safe.

Decoding the Tech Specs
Learning about bike headlights can feel like taking a quick class in electronics. Words like lumens, beam patterns, and IP ratings get used a lot, but what do they really mean for your ride? Let's break down the important specs into practical, easy-to-understand ideas.
Lumens: How Much Brightness?
A lumen is just a way to measure the total amount of visible light that comes from a source. More lumens mean a brighter light, but more isn't always better. The right amount of brightness depends completely on where and when you ride. Too much brightness in the city can blind oncoming traffic, while not enough power on a dark trail is dangerous. After testing hundreds of lights, we've made this simple guide:
- Daytime Flashing (To Be Seen): 100+ lumens. The flash pattern matters more than raw power here.
- Urban Commuting (Well-Lit Streets): 200-500 lumens. Enough to be seen and to spot potholes in dimly lit areas.
- Suburban/Rural Roads (Some Streetlights): 500-900 lumens. You need to see the road ahead as well as be seen from far away.
- Unlit Roads & Trails (To See): 1000+ lumens. When you are the only source of light, you need serious power to light up the path and possible dangers.
Beam Pattern Matters
Lumens only tell part of the story. The way that light is shaped—the beam pattern—might be even more important. A narrow, focused beam (a "spotlight") is great for high-speed road cycling, letting you see far down the road. A wide, even beam (a "floodlight") is perfect for mountain biking, lighting up the whole trail and helping you see around corners.
For city and road cyclists, look for a light with a shaped beam. The best of these follow the German StVZO standard, which has a sharp horizontal cutoff. This design sends all the light down onto the road where you need it, stopping the beam from shining into the eyes of oncoming drivers and cyclists. It's the responsible and safe choice for riding in traffic.
Battery Life and Charging
There is always a trade-off between a light's brightness and how long it runs. Running a light at its highest setting will drain the battery quickly. A smarter approach is to choose a light where the medium or low setting is enough for your usual ride, saving the high beam for when you really need it.
Always check the claimed run time for the specific mode you plan to use most. A light that lasts 10 hours on a low-power eco-flash is useless if it only lasts 45 minutes on the medium setting you need for your commute. Also, look for modern features like a USB-C charging port for faster, more reliable charging and a multi-stage battery level indicator. Nothing is worse than a light dying unexpectedly while you're riding.
Your Perfect Light Guide
The "best" bike headlight is different for everyone. Your perfect light depends on how you ride, where you ride, and what matters most to you. Here's how to choose the perfect bike front lamp based on common rider types.
For the Urban Commuter
Your main goal is to be seen in a complex, busy environment. You need reliability day in and day out.
- Priorities: Being seen by traffic, all-weather reliability, anti-glare beam.
- Look for: 300-700 lumens. A wide beam with a sharp StVZO-style cutoff is perfect to light your path without blinding others. Find multiple flashing modes for daytime visibility, amber side-lights to be seen at intersections, and a strong, quick-release mount for daily use.
For the Road Cyclist
You ride at higher speeds, often during the low-light hours of dawn and dusk. You need to see far down the road and be seen from a long way off.
- Priorities: Long-distance visibility, extended battery life, secure mounting.
- Look for: 800-1200 lumens. A more focused, spotlight-style beam will help you spot dangers far ahead. A powerful and attention-getting daytime flash mode is essential. Your light must run for at least 3-4 hours on a practical medium setting to cover longer rides.
For the Mountain Biker
When you're on the trail after dark, your light is your only guide. It must be powerful, reliable, and tough enough to handle rough terrain.
- Priorities: Maximum trail illumination, durability, secure mounting that won't move.
- Look for: 1200+ lumens, and often much more. A very wide, even flood beam is critical to see obstacles, roots, and upcoming turns. Many trail riders use two lights: a powerful wide beam on the handlebars and a helmet-mounted light that lights up wherever you turn your head.
For the Casual & Bikepacking Rider
Your rides are different each time, and you value versatility and practicality above all else.
- Priorities: Versatility, long battery life, convenient charging.
- Look for: A mid-range light (400-800 lumens) that can also work as a handheld flashlight at the campsite. A key feature for multi-day trips is "pass-through charging," which lets you run the light while it's being charged by a power bank. A simple, universal mount that fits different handlebars is also a plus.
Beyond the Spec Sheet
After testing hundreds of lights, we've learned that some of the most important features aren't listed on the box. These real-world factors can make the difference between a light you love and one that causes constant problems.
The Unsung Hero: Mounts
A brilliant 1500-lumen light is useless if its mount is weak. In our experience, a poor mount is the number one failure point. A cheap silicone strap can let the light droop and point at your front wheel every time you hit a bump. A poorly designed clamp can rattle endlessly or refuse to grip modern oversized handlebars. A great light with a bad mount is a bad light. Look for sturdy, tool-free clamp systems or heavy-duty straps that lock the light securely in place.
Buttonology for Gloves
Imagine it's cold, you're wearing thick winter gloves, and you need to change light modes. A tiny, hard-to-find button that needs a precise press can be frustrating and even unsafe. We always check for a large, easy-to-feel button that gives clear feedback and can be easily used even with numb fingers or bulky gloves.
Weather-Proofing (IP Ratings)
If you ride in all conditions, water resistance is a must. This is measured by an IP (Ingress Protection) rating. A rating of IPX4 means it's "splash-proof" and can handle rain from any direction. A rating of IPX7 means it can be underwater in one meter of water for 30 minutes. For most commuters and road cyclists, IPX4 is enough, but if you often ride in heavy downpours or are a serious mountain biker, looking for IPX6 or higher is a key specification to check for long-term reliability.
Real-World Battery Health
Just like your smartphone, the lithium-ion battery in your bike headlight will get worse over time, holding less charge after a few years of regular use. Many modern lights are sealed units, meaning the battery cannot be replaced. If you are buying a high-end light and expect it to last for many seasons, consider a model with a replaceable battery. This can significantly extend the useful life of your investment.

Installation and Best Practices
Owning a great bike headlight is only the first step. Proper installation and use are crucial for getting the most from it and making sure you're a courteous road user.
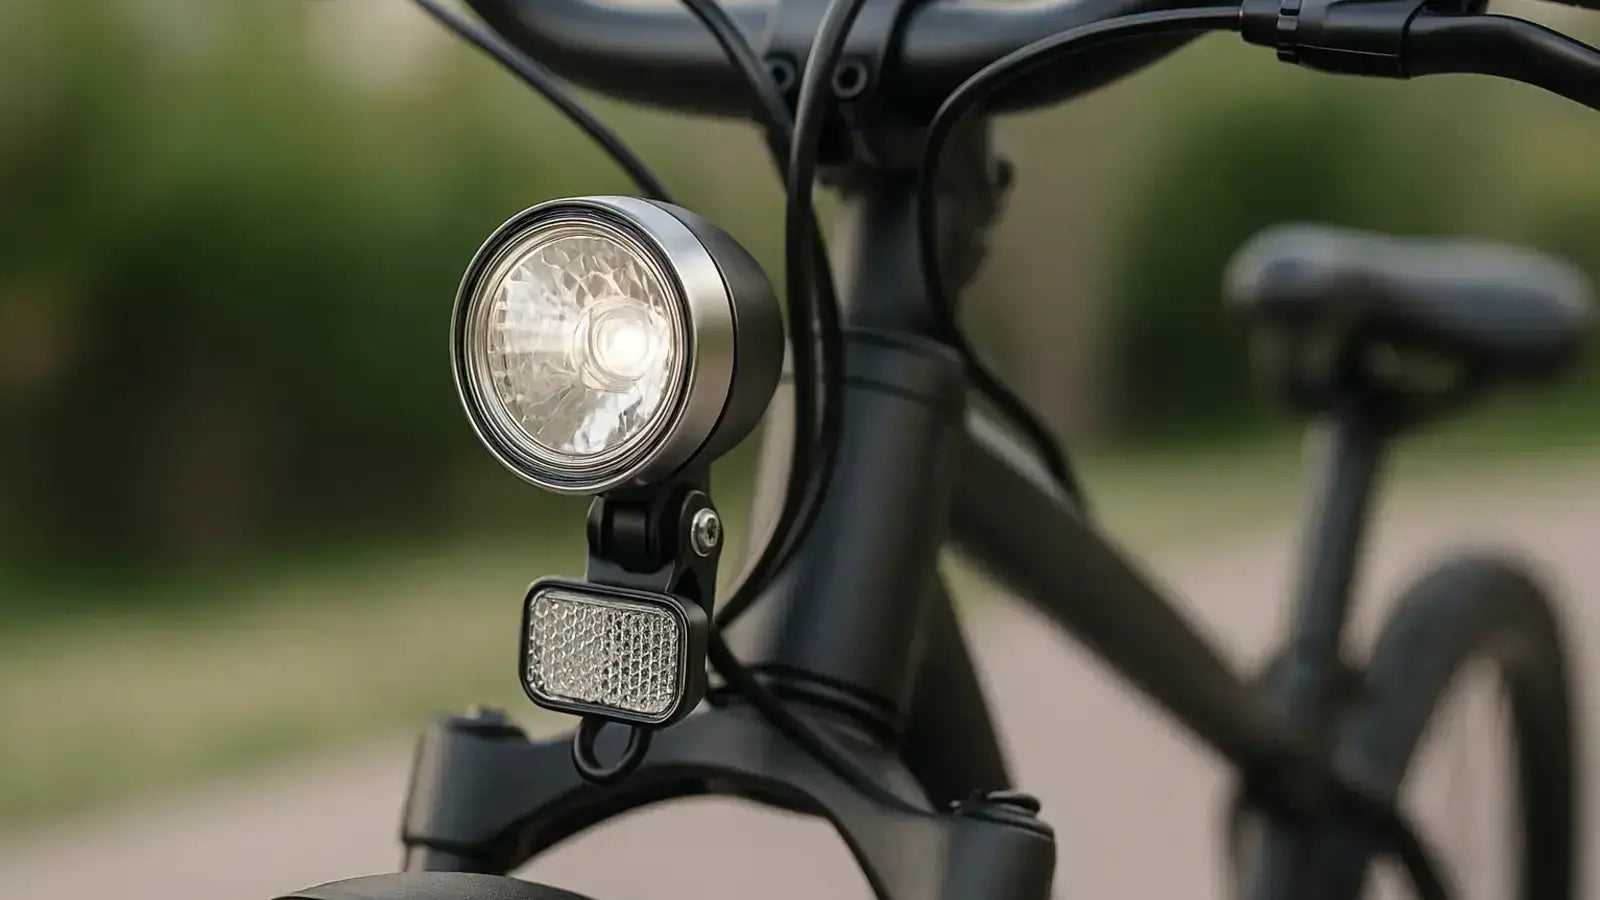
Mounting Your Headlight
For a single-light setup, the best place for your bike front lamp is on the handlebar, as close to the stem as possible. This centers the beam on the path ahead. Make sure the mount is tight and the light is secure before every ride. A quick wiggle test will tell you if it's likely to slip or rattle on the road.
The Art of Aiming
Your goal is to light up your path, not to blind oncoming traffic. A poorly aimed light is both rude and dangerous. A good rule of thumb is the "wall test." Put your bike about 15-20 feet from a wall. The brightest part of your beam's hotspot should be aimed at the ground, with the top of the beam's cutoff hitting the wall below the height of your headlight. This makes sure the road ahead is lit without creating glare for others.
The Pre-Ride Check
Make it a habit to check your lights before every single ride, day or night. This takes only a few seconds. Turn them on to make sure they are working and take a quick look at the battery level indicator. A light with a dead battery is just dead weight. This simple check makes sure you'll never be caught out in the dark.
Final Thoughts
A bike front lamp is an investment in your personal safety. It is the single most effective piece of equipment for increasing your visibility and confidence on the road or trail. The "right" light isn't about having the most lumens; it's about matching the light's performance—its brightness, beam pattern, and features—to the demands of your specific ride. By understanding the basics and thinking about your own needs, you can choose a bike front lamp that will serve you well for years to come. Ride bright, ride safe.
Frequently Asked Questions
1. Q: How many lumens do I need for city commuting?
A: For city commuting on well-lit streets, 200-500 lumens is usually enough. This gives you enough brightness to be seen by traffic and spot road hazards like potholes without blinding other road users.
2. Q: Can I use my bike headlight during the day?
A: Yes, using a bike headlight during the day is highly recommended. Modern lights have special daytime flash modes that make you much more visible to drivers, even in bright sunlight. Studies show this significantly reduces accident risk.
3. Q: What's the difference between a spotlight and floodlight beam?
A: A spotlight beam is narrow and focused, perfect for road cycling to see far ahead. A floodlight beam is wide and even, ideal for mountain biking to illuminate the entire trail and see around corners.
4. Q: How long should my bike light battery last?
A: Battery life depends on the brightness setting you use. For commuting, look for lights that run at least 2-3 hours on your preferred setting. Always check the run time for the specific mode you'll use most, not just the maximum eco-mode time.
5. Q: Do I need a waterproof bike light?
A: If you ride in rain or wet conditions, yes. Look for lights with at least an IPX4 rating for splash-proof protection. For heavy rain or mountain biking, IPX6 or higher provides better long-term reliability.


Leave a comment