

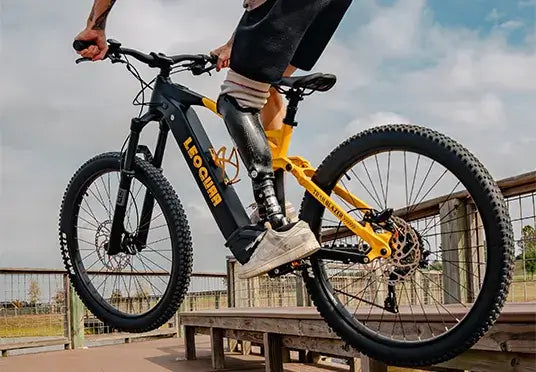


What Is a Recovery Ride And How Do You Do It?
Want to get on your bike after yesterday's long ride, but your legs aren't ready for another workout? A recovery ride is a short, very easy spin after a harder ride or workout. You pedal lightly and leave speed and distance targets for another day.
You can ride one on a normal bike or an e-bike; what matters is the effort you put in. Choose a flat route near your home and decide on a time at which to turn back. With an e-bike, use a sufficient amount of pedal assistance so that you remain able to pedal easily. If you are too tired to ride comfortably, then skip riding that day.
Recovery Ride Basics
A recovery ride provides a means of moving slowly following a demanding ride or training day by keeping your effort below the pace you normally maintain during a steady workout, remaining seated, and finishing without including another intense session; it can be done the day after a long ride if you are well enough to ride.
Even if you find the slow movement pleasant, it won't cure sore legs when you have a deadline to meet. The fact that you feel better while riding does not mean that you're ready for another intense session. Furthermore, deciding to ride a longer distance since the first few minutes were enjoyable can turn what should be an easy day into one that involves more effort.
If you're new to cycling, you don't need to add a recovery ride after every trip to the store. If yesterday was already gentle, another easy ride or a day away from the bike is fine.
Light Pedaling Throughout Your Ride
You ought to be able to talk without having to stop to catch your breath. Your legs should be able to turn the pedals with no great effort. If you find yourself breathing more rapidly in order to hold onto the wheel, then you should move back. When a hill causes you to have to stand and grind, select a different route.
Comfortable conversation is a useful check, but it isn't the whole test. You can still talk during some harder workouts. For a recovery ride, your breathing and pedal pressure should both stay very easy.
British Cycling's recovery guidance recommends Zone 1, the easiest training zone, for recovery rides. If you already train with personal heart-rate or power zones, follow your recovery-zone limit; otherwise, use the breathing and pedal-pressure checks above.
On an e-bike, the display's motor output isn't your own pedaling power. A bigger motor number doesn't tell you how hard your legs are working. Pay attention to your breathing and the pressure you're putting through the pedals instead.
|
Ride check |
Easy effort |
|
Breathing |
You can chat without catching your breath |
|
Pedaling |
Light pressure; no grinding up slopes |
|
Route |
Smooth, mostly flat, and close to home |
|
Company |
A partner who will keep your pace |
Put average speed out of sight if it makes you chase a number. An easy ride into a headwind can be slow. That's fine.
Keep Recovery Rides Short
As a first effort, we recommend allocating 20 to 30 minutes; this is just a suggestion, and there's no need to finish it. You can finish earlier if gentle pedalling still seems like hard work.
The advice given by British Cycling specifies that a recovery ride should last between 30 and 60 minutes on level ground. However, it does not follow that each rider has to ride for an hour; instead, you should select the shorter duration based on your normal ride length and how tired you feel.
Set your turnaround point before you leave. For example, ride along a familiar paved path for 10 minutes, then head back the same way. You won't have to finish a big loop after deciding you've had enough.
Deliberately keep the route plain. A steep shortcut, a poorly maintained path, or a long detour to a favorite café could introduce extra effort that you didn't intend. Instead, a drive through a quiet residential area would be more suitable for you today.

E-Bike Assist for Recovery Rides
An e-bike will allow you to keep pedaling lightly when a slight incline or a headwind would otherwise cause you to exert more effort. You should select an easy gear and then set the amount of assistance so that the effort remains mild. However, there is no single correct assist level for all riders and all routes.
If you're still figuring out the controls, Leoguar's guide to how pedal assist works explains the difference between your pedaling and the motor's help.
Try the setting on level ground before you settle into your ride. Too little help may leave you pushing hard; too much may carry you faster than you want. Change the setting to suit your effort, and keep your speed comfortable for the road or path you're on.
Keep pedaling gently rather than using the throttle for the whole trip. A throttle-only outing may be pleasant, but it isn't the light pedaling session we're describing here. And don't deliberately drain the battery: you don't want the last stretch home to become a hard ride with the assist off.
If you're also shopping for everyday paved rides, the Leoguar Zephyr ST has a step-through frame, swept-back handlebars, seven gears, and five pedal-assist levels. During a test ride, check that you can sit comfortably and pedal lightly without feeling hurried by the motor. Those are more useful checks for an easy ride than the bike's top speed.
Use the bike you already have if it lets you pedal comfortably. You don't need to buy a second e-bike just to do an easy spin.
A 25-Minute Recovery Ride
Here's a simple example for a day when you feel a little tired but otherwise well. Choose a flat out-and-back route with somewhere safe to turn around.
|
Time |
Your plan |
|
First 5 minutes |
Pedal gently and check how you feel |
|
Next 15 minutes |
Hold the same easy effort; turn back halfway |
|
Final 5 minutes |
Ride home gently without a finishing push |
Imagine that you come to a small bridge and find that you're having to put in a lot of effort. Then go into a lower gear and use the assistance before starting up the slope. But if even that isn't making the effort easy, go back before reaching the bridge. You may change your route.
When riding with a friend, decide on your plan before you start—don't rush to catch the signs, don't go up any extra hills, and don't feel pressured to keep up. This way, the recovery ride can be better organized since both of you understand the reason for riding slowly.
Afterward, make one quick note: did you stay comfortable, or did you come home more tired? That gives you something useful to work from next time. You don't need to record a personal best.
When Recovery Means Staying Home
On certain occasions, even a straightforward ride proves to be too much. If you're tired, unwell, or experiencing pain that alters your pedaling, then don't do it. Riding through a painful knee or numbness isn't recovery; instead, seek advice about the cause before continuing to ride.
Bad sleep doesn't automatically mean you must stay home, but think about the whole trip. Would getting dressed, carrying the bike downstairs, and riding in traffic take more out of you than the easy pedaling itself? A rest day may be the better choice.
The weather can also help make the decision for you. Strong winds and slippery roads can make a short journey hard work or require more attention than you currently have. You don’t have to go out just because an app has a ride for you.
An easy spin also can't make up for lost sleep or skipped meals. Give yourself time to eat, drink, and rest after the harder day. If the recovery ride crowds those things out, shorten it or leave it out.
Recovery Ride FAQs
Which e-bike suits recovery rides?
If you prefer to sit up straight, then a cruiser might be the better choice, whereas a commuter bike could be more suitable for your everyday use. Before you buy one, test the fit and how it handles at low speeds, and make sure you can manage the bike's weight when storing it.
Is a power meter worth buying?
You won't need a bike just for doing occasional recovery rides, so keep the money for a comfortable fit and for regular bike maintenance unless you also want to use power data as part of a structured training plan.
Does torque sensing matter at low effort?
A torque sensor reacts to the force applied to the pedals, while a cadence sensor picks up the rotation of the pedals. Since either of these sensors is sufficient for a simple ride, it is a good idea to check how much assistance the bicycle provides when you pedal lightly before deciding to spend extra money on one type of sensor or the other.
Can my commute count as a recovery ride?
It will be the case if the entire journey is short and extremely easy. If there is a deadline, if you have a heavy bag, or if the return route is steep, the trip may become more demanding, so do not conclude that a low average speed implies a low-effort commute.
Can I use an indoor trainer instead?
Certainly, as long as you keep the resistance light. Before fitting an e-bike to the trainer, you should check with the manufacturer to make sure that the trainer's axle, weight, and bike compatibility are suitable; do not assume that your current trainer will fit.


Leave a comment