
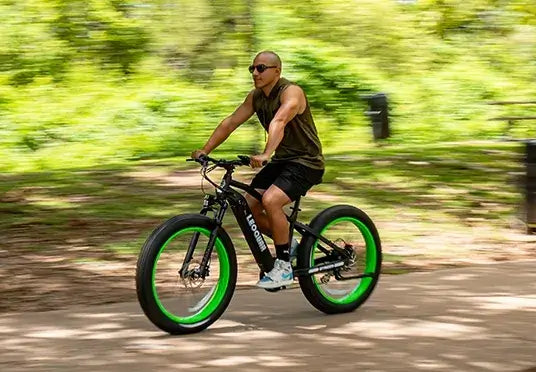






How Do You Use a Bike Pump on an Electric Bike?
It doesn't matter if your tire is underinflated or completely flat; these steps will help you safely recharge it and get back onto your bike.
What to Know Before Using a Bike Pump
Before you fit on the pump and begin to push the air in, there are two important pieces of information that you need. If you get these right, the task—which could otherwise be very frustrating—will become a simple job taking only two minutes. Let us go over them together; this forms the basis for successfully inflating your tires each time.
Step 1: Identify Your Valve (Presta vs Schrader)
Bike tires are provided with two main kinds of valves: Schrader and Presta, and these function in a different way. In order for your bike pump to attach to them, it is necessary to connect it properly. Although the majority of modern pumps are capable of dealing with both types, you first have to work out which one you have so take a quick look at the valve stem on the wheel of your bike.
| Feature | Schrader Valve | Presta Valve |
|---|---|---|
| Appearance | Wider, with a pin in the center, identical to a car tire valve. | Thinner, with a small knurled locknut at the very tip that you can unscrew. |
| Common On | Mountain bikes, hybrid bikes, kids' bikes, cruisers, and many e-bikes. | Road bikes, performance hybrids, and some high-end mountain bikes. |
| How to Open | Ready to pump as-is. The pump's pin will press the valve's pin. | You must unscrew the top locknut before you can inflate the tire. |
The first thing you need to do is work out what type of valve you have because if you attempt to fit a pump head made for one kind onto another it won't work and may in fact damage the valve. At times on pumps you will see the letters S and P close to the pump head; these indicate Schrader and Presta and will help you to quickly select the right side when attaching the pump.
If the pump you have is only compatible with Schrader valves but your bicycle has a Presta valve, you'll need a small bike pump adapter. This type of adapter is cheap and easily obtained, and it allows you to connect the pump securely without harming the valve. To use it, just screw the adapter onto the Presta valve and then attach the pump as you would when using a Schrader valve. Professional bike mechanics also advise checking the valve type before fitting the pump, since forcing the wrong connection may damage the valve or cause slow leaks. Making sure you know how to use bike pump adapters properly will help you achieve a secure fit, particularly since your pump is only designed for Schrader valves.
Step 2: Find the Correct Bike Tire PSI
What does PSI mean? It means Pounds per Square Inch and is the standard unit used for measuring tire pressure. It is important to ride with the correct PSI because if the pressure is too low you are likely to get pinch flats—this happens when the inner tube is squeezed against the rim—and your ride will be slow. On the other hand, if the pressure is too high your ride will seem harsh and you will lose traction.
Then how do you work out the correct pressure? It is printed directly on your equipment. If you examine the side of your bicycle tire carefully, you will notice a range built into the rubber, for instance, Inflate to 50-70 PSI. This is the pressure range which the manufacturer recommends.
Although the figure on your tire is always the most reliable guide, the following is a general reference chart; locating the sweet spot within that range can make a big difference to your ride, a point which experts frequently address when tuning road bike tire pressure.
- Road Bike: 80-120 PSI
- Hybrid/Commuter Bike: 50-70 PSI
- Mountain Bike: 25-45 PSI
- Fat Tire/E-Bike: 5-30 PSI
The PSI figures are based on advice given by major cycling organizations and tire manufacturers in order to guarantee accuracy for all kinds of bikes.
Begin with a pressure that is within the middle of the tire's recommended range and then make adjustments according to how the ride feels. If you're doubtful about the gauge on your pump, you can use a digital tire pressure gauge to get more accurate readings; you just need to press it onto the valve (making sure to open the Presta if necessary) and it will show the exact PSI on its screen. This is particularly useful for road bikes and tubeless tires where accuracy is important. Just as crucial as knowing how to use a bike pump correctly is knowing the right PSI since both things have to work together to achieve the best ride quality.
Once you have determined the type of your valve and the correct PSI, let's look at the specific methods for using bike pump techniques with both manual and electric pumps.
Step 3: How to Use a Bike Pump Manually (Step-by-Step Guide)
It is the standard approach and every cyclist should possess this ability. We are looking at a floor pump (sometimes referred to as a track pump) since it is the simplest and most efficient kind to use at home. Although the principles are almost the same with smaller hand pumps, the latter require more effort. Most current pumps come with a smart head that is suitable for both Presta and Schrader valves, or they have a dual-head with a separate hole for each.
- 🔧 Step 1: Prepare the Valve
- 🔌 Step 2: Connect the Pump Head
- 📈 Step 3: Start Pumping
- 📏 Step 4: Monitor the Gauge
- ✅ Step 5: Disconnect and Finish
1. Prepare the Valve
- With a Schrader valve, just unscrew the plastic dust cap and put it to one side. The valve is then ready.
- With a Presta valve, first remove the plastic dust cap. Next, gently unscrew the small locknut at the end of the valve; you only need to turn it a few times until it becomes difficult to turn further. Do not take it off entirely. In order to make sure the valve is not stuck, give the tip a quick push and you should hear a short psst of air; this means that the valve is open and ready for inflation.
2. Connect the Pump Head
Press the pump head firmly and directly down onto the valve, pushing it as far as it will go without causing discomfort. You should then feel it click into place securely. After that, activate the locking mechanism. With most floor pumps, this is a lever which you move up so that it is parallel with the hose. If you're unsure whether the lever should be in the up or down position, remember that when inflating it usually moves up to lock the seal. Knowing how to use a bike pump with a lever properly will make the whole process quicker and stop unnecessary loss of air.
Once you have finished pumping, push the pump head back down before removing it because a secure connection is important. If you hear a continuous hissing noise, then the seal is not airtight. In this case, disconnect the head and attempt it again, ensuring that it is inserted properly. Nowadays, many pumps have two holes in the head—one larger one for Schrader valves and a smaller one for Presta valves. You must use the right hole since forcing the wrong one onto the valve may result in leaks or even damage the pump head. When your pump has a dual-head design, knowing how to use a bike pump with two holes will help you to prevent air leaks and make sure that the tires are inflated correctly.
3. Start Pumping
When the pump head is locked in position, you can begin to inflate the tire. To stay steady, place your feet on the base of the pump. Apply your body weight, not just your arms, when pushing the handle down in long, smooth and full strokes. We've all experienced it – making short, ineffective jabs that don't move the needle at all. It's important to use your full body weight and extend your arms completely if you want to pump efficiently and fill the tire quickly. Most floor pumps have a lever close to the pump head which secures it in place. Make certain that this lever is in a 90-degree position while you're pumping; if it's not engaged, air will escape and the tire won't be inflated properly. In some cases a push-down lever is used – always refer to the instructions that come with your pump.
4. Monitor the Gauge
A good floor pump comes with a pressure gauge. While you're pumping, observe the needle rising. Keep pumping using those smooth strokes until the needle gets to the PSI level that you spotted on the side of your tire. When the recommended pressure range is 50 to 70 PSI, 60 PSI is an excellent starting point. Avoid inflating the tire beyond the maximum pressure that is suggested.
5. Disconnect and Finish
- With regard to a Presta valve, gently tighten the small locknut which you had previously loosened, taking care not to tighten it too much.
-
For each of the two types of valve, put the plastic dust cap on again. That's all.
How to Choose the Right Bike Pump for Your Ride
Choosing the correct pump will save you time and make the process a lot smoother.
How to Use an Electric Bike Pump: Easy Beginner Tips
There is a wonderful and easy alternative available in the form of a portable electric bike tire pump. Such pumps have got smaller in size, stronger in power, and cheaper in price. They are now a preferred option for both new and experienced cyclists.
| Bike Pump Type | Best For | Pros | Cons |
|---|---|---|---|
| Floor Pump | Home maintenance | Fast inflation, accurate PSI gauge | Less portable |
| Mini Hand Pump | Emergency rides | Lightweight, fits in your bag | Takes longer to inflate |
| Electric Pump | Beginner-friendly, precise PSI | Automatic, accurate, effortless | Requires charging |
| CO₂ Inflator | Quick roadside fixes | Super fast, compact | One-time use, less accurate |
What is the advantage of using an electric pump?
- Achieving inflation is simple: choose the pressure you want, press a button, and the pump will carry out all the work for you. You won't need to do any manual work.
- Perfect accuracy is achieved through the use of a digital gauge and an auto-shutoff feature. The pump will turn off automatically once it has reached the exact PSI that you have set. This removes any need for guessing.
- They are small so that you can take them on a journey and will never end up stranded because of a flat tire far from home.
There are now a great many good choices available. This has been established through thorough tests of the top electric bike pumps, which demonstrate their convenience and reliability. In preparation for this guide, we carried out personal tests on a number of well-known electric pumps and compared their speed, noise level, and accuracy in measuring PSI so that you will be able to trust the real-world recommendations we provide.
How to Use One
- Charge it: Start by making sure that the pump is well charged. Most pumps use a standard USB-C cable, just as a modern smartphone does.
- Set your PSI: Switch on the device and use the + and - buttons to set your desired pressure on the digital display. Alternatively, you can usually choose your preferred unit (PSI, BAR, etc.).
- To connect the hose: most electric pumps come with a short, flexible hose, which you screw onto the pump at one end and onto the valve of your tire at the other; they usually have adapters for both Presta and Schrader valves.
- Press Start: Press the power or start button and the pump will begin to whir and inflate the tire. It may be loud, but it's quick.
- The best feature of this system is that the pump will continue to operate until the predetermined pressure is reached and will then switch off automatically.
- To disconnect, just unscrew the hose from the valve, put the valve cap on again, and you're ready to go.
Tip: When you're using an electric bike pump with a Presta valve, make sure that your device is capable of handling it. Although some models come as standard with only Schrader valves, this means that you'll need a small bike pump adapter. Simply screw the adapter onto the Presta valve and then attach the pump as you normally would. This way, you avoid having to deal with a bad seal or air leaks. A great many riders consider it essential to know how to use bike pump adapters with electric pumps, particularly when switching between Presta and Schrader valves.
Bike Pump Troubleshooting: How to Fix Common Problems
It's not uncommon for things to go wrong the first time. That's perfectly all right; we ourselves have come across all of these problems, so don't feel bad about it, you're not the only one. The following are the solutions to the most common difficulties you may encounter when learning to use a bike pump.
| Problem | Likely Cause(s) | How to Fix It |
|---|---|---|
| Air hisses out when I connect the pump. | The pump head isn't on straight or isn't pushed down far enough before locking. | Disconnect the pump head. Re-attach it, making sure it's perfectly straight and pushed all the way down onto the valve. Then, flip the locking lever firmly. |
| I'm pumping, but the tire isn't inflating. | (For Presta): The top locknut is still tightened. (For Both): The pump head is not configured for your valve type. | Double-check that the Presta locknut is unscrewed. For some pumps, you must unscrew the pump head's cap and flip a small rubber gasket inside to switch between Presta and Schrader. Check your pump's instructions. |
| The pump lever is very hard to lock down. | The pump head is not pushed far enough onto the valve stem. | This is counterintuitive, but it usually means you need to push the head further down onto the valve before you try to flip the lever. This gives the lever the clearance it needs to lock properly. |
| The tire deflates after I remove the pump. | (For Presta): You forgot to re-tighten the locknut. (For Both): The valve core may be loose or faulty. | For a Presta valve, always remember to tighten the locknut after inflating. If it's a Schrader valve (or a Presta with a removable core), you may need a small valve core tool to gently tighten the core inside the stem. |
The troubleshooting advice given here comes straight from certified bike technicians to make sure that you receive accurate and thoroughly tested solutions not just general guesses.
If you've ever asked yourself why I'm not able to pump air into my Electric Bikes Under $1,500, it's generally because of one of three things: the pump head isn't sealed properly, the Presta valve is still locked, or the pump you're using isn't set up for the correct valve type. Check all of these points before concluding that there's a leak.
Bike Pump Maintenance Tips: Keep It Working Like New
A pump that is well looked after is capable of lasting for many years. Every few months you should check the rubber gasket located inside the pump head since a worn gasket may result in air leaks. When using a pump that has a lever, do not force it when locking the head in order to avoid cracking it. It is also important to give the pump a quick wipe down after each ride to prevent dust from affecting the seal.
What If You Don’t Have a Pump at Home?
Even if you find that your tire pressure is low and you don't have a pump, there are still some alternatives. You can usually borrow one from most local bike shops, and a number of them will even give you free help. In certain areas, there are also community bike pump stations which are situated at trailheads, parks, or along Pedal Assist Electric Bikes paths. If such stations aren't available, an air compressor at a gas station will do as well—though you should be careful since they pump air very quickly. If your bicycle is fitted with a Presta valve, you'll also need a small adapter.
You're Ready to Ride
Quick Recap: How to Use a Bike Pump
To sum it up quickly, you should select the right kind of pump, work out what valve you have, securely attach the pump head, and then inflate it to your recommended PSI. No matter if you're using a manual pump or an electric one, knowing how to use a bike pump correctly will ensure safer rides and smoother performance.
Well done! You now have the knowledge needed to carry out one of the most common and important bike maintenance tasks. By learning how to use a bike pump correctly, you take control of both the quality and safety of your ride. You are able to confidently determine the type of your valve, locate the correct ebike tire PSI, and use either a manual or an electric pump to complete the task.
Make it a habit to check your tire pressure as part of your pre-ride routine since it only takes a minute but makes a great difference to how your Fat Tire Electric Bikes feels and performs. So now go and have a smooth, efficient and worry-free ride.
Frequently Asked Questions
1. How frequently should you pump your bike tires?
It is advised that you check your tire pressure before each and every ride since tires tend to lose a small quantity of air over time, and high-pressure road bike tires may require having their pressure topped up every 1 to 2 days whereas wider mountain or hybrid tires are often able to go a week or so without need of a top-up.
2. May I use the air compressor at a gas station?
We do not recommend using them. The compressors found at gas stations are made for inflating car tires in large quantities and can fill a bicycle tire too quickly, which may cause it to burst. Moreover, they usually do not have gauges accurate enough for bicycle tires and tend only to fit Schrader valves.
3. What is the difference between a floor pump and a hand pump?
A floor pump is a large pump that you stand on. It's highly efficient, has a long hose, and an accurate gauge, making it perfect for home use. A hand pump (or mini-pump) is small and portable, designed to be carried on your bike for emergency flat repairs on the road.
4. My pump doesn't have a gauge. What should I do?
While a gauge is highly recommended, you can get by without one. Use the squeeze test. Press on the tire with your thumb. A road tire should feel nearly rock-solid. A hybrid tire should have a little give, and a mountain bike tire should depress noticeably but still feel firm.
5. Why does my tire lose air after I pump it up?
This usually happens because the valve wasn't properly closed after pumping. For Presta valves, make sure you tighten the small locknut after removing the pump. For both valve types, ensure the dust cap is screwed on tightly. If the tire continues to lose air, you may have a slow leak that needs repair.
6. Can I Use a Bike Pump with a Needle?
Absolutely! If you want to inflate sports balls or inflatable toys, just attach a pump needle adapter to your bike pump. Insert the needle into the ball’s valve, lock the pump head, and add air slowly. Go gently here, as balls and small inflatables require much lower PSI than bike tires.
7. Can I Use a Bike Pump to Inflate a Pool or Air Mattress?
Yes, but it takes patience. Most bike pumps can inflate pools, air mattresses, and other large inflatables if you have the right adapter. Use a high-volume setting if your pump has one, and expect it to take longer than filling a tire. For frequent use, an electric pump is faster and easier.
8. How to use a bike pump with a needle?
Attach a needle adapter to your bike pump, insert it into the ball or toy, and pump slowly. Knowing how to use bike pump with needle ensures you avoid overinflating delicate inflatables.
9. Can I use a bike pump for an air mattress or pool?
Yes! With the right adapter, you can learn how to use bike pump for air mattress or even how to use bike pump to blow up pool toys. For larger inflatables, an electric pump is usually more efficient.


Leave a comment